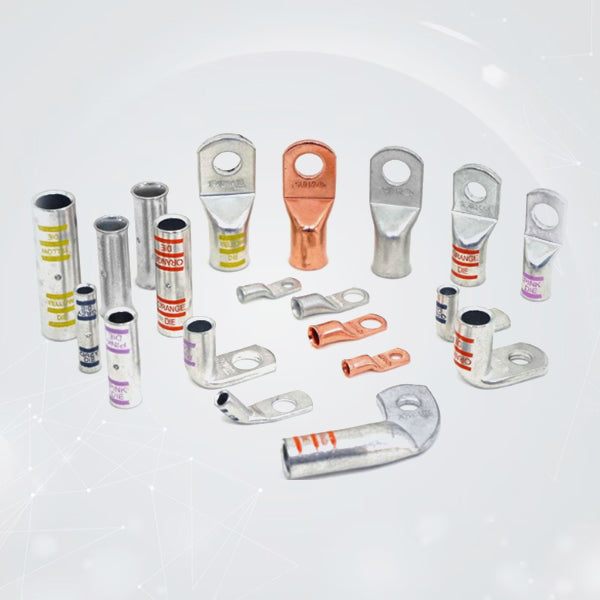


250 MCM Lug Dimensions: A Comprehensive Size and Clearance Chart
Upgrading commercial building service entrances, massive industrial motor mains, or grid-scale battery storage banks means moving past standard fractional wire sizes. When you step up to 250 MCM (also known as 250 kcmil) cabling, you are managing thick, heavy copper or aluminum conductors designed to carry hundreds of amps continuously. At this industrial tier, guesswork kills power efficiency and ruins safety margins.
A cable this massive requires a perfectly matched terminal connector to operate without failure. Squeezing a heavy commercial barrel with generic hand tools or trying to distort a pad to fit a tight enclosure space fails. The connection point is always your primary risk zone. High-voltage power distribution setups require a flawless metal-on-metal bridge that handles maximum current without creating structural bottlenecks or localized resistance zones. That means using exact engineering metrics and selecting a precisely matching 250 mcm lug to secure your heavy-duty lines.
The Reality of Commercial Hardware Stamping and Enclosure Hazards
Mismatched stud sizes or buying hardware with an incorrect pad width creates immediate electrical hazards inside a panelboard. A loose mounting hole limits the surface contact area, sparking immediate voltage drops and massive thermal spikes under peak loads. When routing high-amperage lines through dense switchgear enclosures or deep transformer boxes, referencing exact 250 kcmil lug clearances is your primary defense against sudden industrial power outages.
Look at the unbranded, generic electrical connectors imported in bulk bins for discount commercial jobs. Most of those cheaper options are stamped out of thin-walled copper pipes or cast from inferior metal alloys that fail to meet strict industrial specifications. They tear or split under high mechanical torque. The moment an electrical contractor applies 12 tons of hydraulic force to compress a heavy-duty barrel, those cheap options split open down the side or warp across the flat face. Commercial switchgear, industrial manufacturing plants, and outdoor generator enclosures are brutal on electrical gear. Heavy machinery creates continuous, floor-shaking vibrations, while industrial engine rooms experience extreme thermal swings. Thin retail terminals break down under this constant physical stress, relaxing their mechanical grip on the wire strands and creating arc flash hazards.
Why Pure Copper Substrate Eliminates Industrial Resistance Bottlenecks
Long-term industrial reliability relies entirely on the quality of the underlying metal. High-current infrastructure demands connections built from seamless C11000 electrolytic copper. This pure grade provides the highest possible electrical and thermal performance. Because pure copper is naturally soft, malleable, and workable, it deforms uniformly under intense hydraulic tool pressure.
A seamless 250 mcm cable lugs barrel flows completely around the hundreds of individual flexible wire strands instead of splitting open down a weak side seam. This uniform compression fuses the wire and the connector into one solid block of copper with zero hidden air pockets inside. True longevity in harsh industrial environments requires starting with heavy-duty, thick-walled pure copper that can handle an absolute cold-weld crush without cracking open down the side.
The Danger of Soldering Large-Scale Power Lines
An old-school workshop repair trick that consistently ruins heavy power cables is trying to use a propane torch and liquid solder to secure heavy cable connectors. Solder creates a clean-looking joint initially, but modern industrial National Electrical Code (NEC) standards ban the process for primary power distribution connections.
As heat melts the solder into a massive terminal barrel, capillary action draws the liquid metal straight up the flexible stranded wire past the lug entry. Once cooled, the solder hardens, turning a flexible power cable into a stiff, solid metal rod. Industrial equipment vibrates constantly. All that mechanical stress concentrates directly at the exact spot where the flexible wire insulation meets that rock-hard, soldered section. Over time, individual copper wire strands suffer from intense metal fatigue and snap clean off right at the back of the terminal barrel. The industry standard for a rock-solid circuit is a gas-tight mechanical crimp. Forcing the barrel to compress uniformly from six sides cold-welds the wire strands directly to the inner walls, sealing out all air so interior rot cannot start.
250 MCM Dimension and Clearance Chart
Choosing the right pad hole diameter prevents loose connections and maximizes current transfer. Industrial alternators, battery terminals, and chassis grounding points use various bolt dimensions. Guessing the size usually results in a sloppy fit or a terminal that won't slide over the stud.
|
Stud/Hole Size |
Pad Width |
Barrel Inside Diameter |
Barrel Outer Diameter |
Best Tooling Type |
|
5/16" Stud |
1.09 Inches |
0.595 Inches |
0.750 Inches |
12-Ton Hydraulic Hex |
|
3/8" Stud |
1.09 Inches |
0.595 Inches |
0.750 Inches |
12-Ton Hydraulic Hex |
|
1/2" Stud |
1.09 Inches |
0.595 Inches |
0.750 Inches |
12-Ton Hydraulic Hex |
To ensure a proper fit without modifying the hardware, verify the spacing around the terminal pad before ordering. A matching 250 mcm wire lugs setup should slide over the bolt thread easily without excessive side-to-side play. If the hole is too large, the mounting washer will bow into the gap, reducing contact area and creating an immediate electrical bottleneck.
The 250 MCM Commercial Crimp Process
The Method
1. Strip It to Bare, Bright Copper: Requires clean strands.
Do not ever crimp over dark, corroded, or greasy wire strands. If the cable has been sitting around a damp shop, chop the bad ends off until you hit clean, bright metal. If it still looks a little dull, grab a stainless steel wire brush and scrub the strands aggressively. You want that copper shining before it goes anywhere near the barrel.
2. Check Your Depth: Verify alignment.
Slide the wire jacket back to match the depth of the lug barrel. Shove the wire all the way in until copper strands pack tightly against the inspection window. The leftover insulation jacket needs to sit flush against the back of the barrel—keep any gap under a sixteenth of an inch.
3. Use the Right Hex Die: 12-ton tool stroke.
Match your wire gauge exactly to the die on your crimping tool. No guessing here. Use a solid hydraulic or manual hex tool to crush the barrel completely. Let the tool go through its full mechanical cycle so it cold-welds the strands and terminal walls into a single, solid chunk of copper.
4. Bury the Joint in Glue-Lined Heat Shrink: Environmental seal.
Slide a piece of heavy-wall, 3:1 adhesive-lined heat shrink directly over the raw metal connection and hit it with a heat gun. Wait until the internal glue melts and squirts out around the bottom edges of the tubing. That squeezed-out glue is your proof—it creates a permanent, waterproof seal that stops road salt, pooling water, and engine grease from rotting your wires over time.
Preventive Care of Systems
Preventative care keeps an electrical system online over the long haul. Give every connection point a physical check once a season. Do not just glance at it. Get your hands in there. Check for lifting around the heat shrink edges or a dull, graying look on the metal surfaces. Wiping a little specialized dielectric paste or anti-corrosion spray over the bolted joint creates a solid backup boundary against the air.
If you have to pull a terminal off for an equipment upgrade, clean the pad faces right down to the bright copper layer with a clean rag and some isopropyl alcohol. Ditch the sandpaper. Never touch a copper pad with a coarse file or heavy emery cloth. Aggressive scratching deep-pits the metal surface, creating tiny gaps that trap moisture and invite instant corrosion once everything is bolted back together. Scrap the worn hardware. If a terminal pad looks visibly gouged, warped, or shows deep green rot eating into the barrel entry, throw it in the scrap bin. Do not reuse it. Just cut the wire back to fresh strands and crimp a clean one into place.
Choosing a 250 MCM Lug Collection Built for High-Current Conductivity
Your system's entire electrical performance relies on its worst connection point. Skimping on basic wire ends leads to sudden power drops, dead accessories, and hours of miserable diagnostic work in your driveway or industrial site. You do not want to deal with that.
If you want hardware built to actually survive extreme industrial heat and brutal mechanical vibrations, checking out a premium heavy-duty termination kit is your ideal next move. Stamped out of 99.9% pure annealed copper tubes, professional-grade fittings provide an even, massive crush under heavy tool pressure alongside maximum conductivity. Swapping out old, sketchy factory ends for a premium, heavy-duty 250 mcm lug stops resistance buildup and voltage drops right in their tracks, creating a cool-running, highly efficient power setup that handles commercial electricity flawlessly.