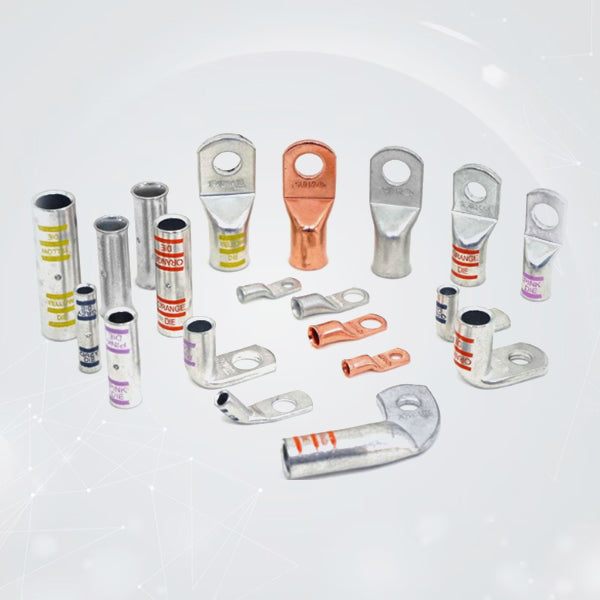


8 AWG Lugs for Automotive Wiring: Installation Tips and Insights
Cars and trucks push electrical connections hard. Starting circuits, auxiliary lights, winches, and aftermarket audio all demand reliable power delivery. 8 AWG lugs match 8 gauge cable perfectly for these applications. They handle 50-70 amps continuously without overheating or voltage drop.
8 awg terminal lug designs fit tight engine bays and battery compartments. 8 gauge terminal lugs secure connections under constant vibration. 8 gauge battery lugs provide clean power to high-draw accessories. Proper installation makes the difference between reliable performance and early failure.
Why 8 AWG Cable Needs Matching Lugs
8 AWG cable carries 50-70 amps safely (NEC 75°C rating). Automotive uses include:.
- LED light bars (30-50 amps)
- Backup winches (60 amps continuous)
- Electric fans (25-40 amps)
- Aftermarket audio amplifiers (40-60 amps)
- Secondary battery feeds
8 awg lugs have barrels sized exactly for 8 AWG stranding. Cable fills 90-95% of barrel space. This creates maximum metal-to-metal contact after crimping.
Wrong size lugs cause problems:
- Smaller lugs overheat at 50 amps
- Larger lugs leave air gaps and loose connections
Tool Selection Makes Clean Crimps
Automotive crimping demands specific tools. Cheap pliers ruin connections.
Recommended tools:
- Ratchet-style hex crimper with 8 AWG die (best choice)
- Indent crimper for field repairs (acceptable)
- Never use: hammer, vise grips, or generic pliers
Why proper dies matter:
- Creates uniform 360° compression
- Forms gas-tight connection
- Barrel shrinks 20% in diameter
- Maintains shape under engine vibration
Quality crimpers cost $40-80 but last year. They pay for themselves by preventing connection failures.
Cable Preparation Steps
Proper prep prevents 90% of installation problems.
Step-by-step process:
- Cut square using cable cutters (no crushing strands)
- Strip exactly 1/2 inch insulation (matches lug barrel length)
- Inspect strands and remove any broken wires
- Lightly twist strands into tight bundle
- Test fit in lug barrel before crimping
Critical check: Insulation touches barrel end exactly. No copper strands stick out behind the lug.
Perfect Insertion Creates Strong Connections
8 awg terminal lug performance depends on full cable insertion.
Positioning rules:
- All strands enter barrel completely
- Insulation butts against barrel mouth
- Cable fills 90%+ of barrel space
- No gaps visible around strands
Hand test verification:
- Gently rotate cable (no movement inside barrel)
- Firm tug resists pulling out
- Slight "set" feeling confirms proper fill
Partial insertion doubles resistance and creates heat buildup.
Single Crimp Technique Works Best
8 gauge terminal lugs need one perfect compression.
Execution steps:
- Place lug in die center
- Position crimp over barrel midpoint
- Squeeze through full ratchet cycle
- Inspect smooth hexagonal barrel shape
What good crimp looks like:
- Clean hexagonal pattern around barrel
- 20% diameter reduction
- Smooth edges, no cracks
- Cable stays rock-solid after tug test
Double crimping the same spot weakens barrel walls.
Stud Size Guide for Automotive Terminals
8 gauge battery lugs come in sizes matching vehicle terminals.
Common automotive applications:
- 1/4 inch studs: Distribution blocks, relays
- 5/16 inch studs: Battery side terminals, controllers
- 3/8 inch studs: Main battery posts, starter solenoids
Perfect fit characteristics:
- Lug palm sits completely flat
- No wobble side-to-side
- Nut threads 5-6 full turns
- Withstands 120 inch-pounds torque
Heat Shrink Seals Against Engine Bay Abuse
Cars expose connections to oil, coolant spray, road salt, and heat.
3:1 adhesive heat shrink protects 8 awg lugs:
- Slide on before crimping (can't add after)
- Position to cover 3/4 inch cable + full lug
- Heat evenly until adhesive melts and flows
- Confirm watertight seal forms
Automotive-grade shrink resists:
- 105°C engine compartment temperatures
- Oil and gasoline splash
- Road salt corrosion
- UV exposure under hood
Vibration-Resistant Features Matter
Engine bays vibrate constantly. Poor lugs loosen within months.
8 awg terminal lug vibration protection:
- Seamless barrel construction (no weld seams to crack)
- 0.05-inch minimum wall thickness
- Chamfered entry prevents strand damage
- Reinforced palm-to-barrel transition
Quality lugs pass 500 hours of automotive vibration testing.
Automotive Application Guide
| Accessory | Amps | Cable Length | Lug Stud Size | Special Notes |
| LED Light Bar | 40 amps | 15-20 feet | 1/4 inch | Long runs need voltage drop calculation |
| Electric Fan | 30 amps | 6-10 feet | 5/16 inch | Heat shrink mandatory |
| Audio Amplifier | 50 amps | 8-12 feet | 5/16 inch | Pure copper essential |
| Backup Winch | 60 amps | 12 feet | 3/8 inch | Heavy-duty palm required |
| Auxiliary Battery Feed | 40 amps | 4 feet | 3/8 inch | Battery post fit critical |
Torque Specifications Prevent Loose Connections
Over-tightening strips threads. Under-tightening causes arcing.
Recommended torque values:
- 1/4 inch studs: 75 inch-pounds
- 5/16 inch studs: 120 inch-pounds
- 3/8 inch studs: 200 inch-pounds
Installation tips:
- Clean terminal first (wire brush removes corrosion)
- Use star lock washers (vibration resistance)
- Check torque after 100 miles (connections settle)
- Re-check annually or every oil change
Troubleshooting Common Problems
Hot connection (over 60°C):
- Cause: Poor crimp or wrong lug size
- Fix: Cut off, re-crimp with proper die
Voltage drop over 0.3V:
- Cause: Loose stud or partial strand insertion
- Fix: Verify torque, check insertion depth
Corrosion buildup:
- Cause: No heat shrink or poor seal
- Fix: Replace with adhesive-lined tubing
Crimp pulls apart:
- Cause: Wrong die or cheap crimper
- Fix: Upgrade to ratchet crimper with dies
Maintenance Keeps Connections Reliable
Monthly visual inspection:
- Check for heat marks or discoloration
- Verify heat shrink integrity
- Look for loose connections
Annual service:
- Retorque all 8 gauge battery lugs
- Test continuity (<0.1 ohm)
- Replace any compromised heat shrink
Cost vs Reliability Reality
Budget lug + pliers: $15 total, fails in 6 months
Quality 8 awg lug + proper crimper: $60 total, lasts 5+ years
Protected equipment:
- Audio system: $800+
- Light bar: $400+
- Winch: $500+
- Electric fans: $200+
Quality pays for itself first time it prevents failure.
Final Thoughts
8 AWG lugs solve automotive wiring challenges perfectly. They match cable capacity exactly. Pure copper construction minimizes voltage drop. Heavy design withstands engine bay abuse.
8 awg terminal lug reliability comes from proper crimping. 8 gauge terminal lugs stay tight under vibration. 8 gauge battery lugs deliver clean power to demanding accessories.
Installation essentials:
Ratchet crimper with matched dies
- Full cable insertion every time
- Adhesive heat shrink sealing
- Correct torque specifications
- Annual maintenance checks