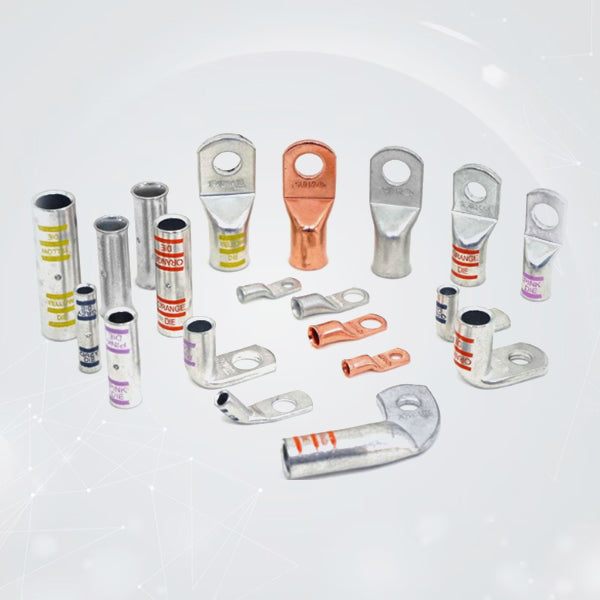


90 Degree Battery Lugs: Top Benefits in Electrical Applications
A battery box with six inches of clearance does not care how experienced you are. It will jam a straight lug against the lid every single time, and I found that out again on a van conversion that was supposed to take an hour and took three.
The Compartment That Started It
Dual battery bank, factory enclosure, barely enough room to get a wrench in sideways. I crimped a straight lug first out of habit, the way I always had on open engine bays with room to spare.
The cable stood straight up off the terminal and hit the lid before it even got close to shutting. No amount of pushing or repositioning helped. The geometry was wrong from the start, not the crimp itself.
That is the specific gap 90 degree battery terminal hardware is built to close. Cable routes sideways off the ring instead of straight up, clearing lids and side panels that swallow standard lugs whole.
Cutting Cable Twice on the Same Job
Twenty minutes gone, just like that. I trimmed back two inches of 2/0 cable, stripped it fresh, and started the crimp over with a bent lug this time.
Premium copper cable costs real money by the foot, so a redo like that stings more than the time loss alone. It is the kind of mistake that only happens once if you are paying attention afterward.
Measure the enclosure before the crimper ever comes out of the bag. That single habit would have saved the entire detour that morning.
Why the Bend Location Actually Matters
A straight lug forced sideways under a tight lid keeps constant pressure sitting right at the crimp barrel, day after day, vibration after vibration.
Over months on the road, that pressure works copper strands loose exactly where you need them locked tight. It is a slow failure, the kind nobody notices until a connection finally goes intermittent.
90 degree battery cable ends move that bend up into the lug itself instead of forcing the crimp to absorb it. The barrel sits relaxed no matter which way the lid closes around it.
Two Batteries, Two Completely Different Angles
Left side of the bank needed cable routed back toward the rear wall. Right side needed the opposite direction entirely, same bank, same install, same afternoon.
Assuming both terminals need identical hardware is a mistake I have made more than once. Dry-fitting before crimping catches that every time, and it takes thirty seconds.
- Confirm bend direction before crimping, left and right are not interchangeable
- Dry-fit against the actual terminal before committing to a final crimp
- Stock spares across gauge sizes and bend directions both
Skipping that check is how a second re-cut happens on the same job.
Testing the Crimp Before Trusting It
A proper hex crimp on 90 degree battery lugs holds well past 300 lbs before any strand separation shows up under load.
I pull test every crimp by hand before heat shrink goes anywhere near it. Firm tug, zero give at all, that is the bar I hold every connection to.
Bend geometry only changes the ring end of the lug. Internal barrel compression performs identically to a straight lug rated for the same wire gauge, nothing about the crimp strength changes.
I keep a small tag on my crimper case listing pull test numbers by gauge, a habit from an old shop foreman who never trusted memory alone on jobs like this.
Sealing the Connection Before the Lid Shuts
Purple adhesive glue beading out along the shrink tube edge is the visual confirmation that a seal actually closed around the barrel underneath.
Sealed compartments trap condensation worse than open engine bays ever do, especially in humid climates or anywhere near coastal air. Moisture builds inside a closed box in ways people underestimate constantly.
Adhesive-lined heat shrink keeps that trapped moisture off bare copper strands entirely. Skip that seal inside a closed enclosure and corrosion has nowhere left to go but into the crimp.
The Lid Finally Closes Clean
Cable routed flat against the compartment wall, lid dropped shut, zero pinch points anywhere near either terminal this time around.
That is the entire payoff of getting the hardware right. Nothing dramatic, just a connector shaped correctly for the actual space it has to live inside for years.
A ten dollar part saved the better part of an hour that morning, once it was finally the right shape for the enclosure it was going into.
The Small Part That Changed the Whole Job
Looking back, the actual fix cost less than the coffee I bought on the way to the site that morning.
Nothing about the wiring, the battery capacity, or the rest of the build changed. One connector shaped differently solved a problem that felt much bigger while I was standing there frustrated with a lid that would not close.
What This Job Actually Taught Me
Measure enclosure clearance first, every single time, before cutting or crimping a single cable end on a new job.
Good 90 degree battery cable lugs exist specifically for boxes, panels, and compartments where a straight connector will not clear the lid no matter how you angle it.
Check bend direction, check clearance, and never assume the last install taught you everything you need for the one sitting in front of you right now.
Clearance first, crimp second.