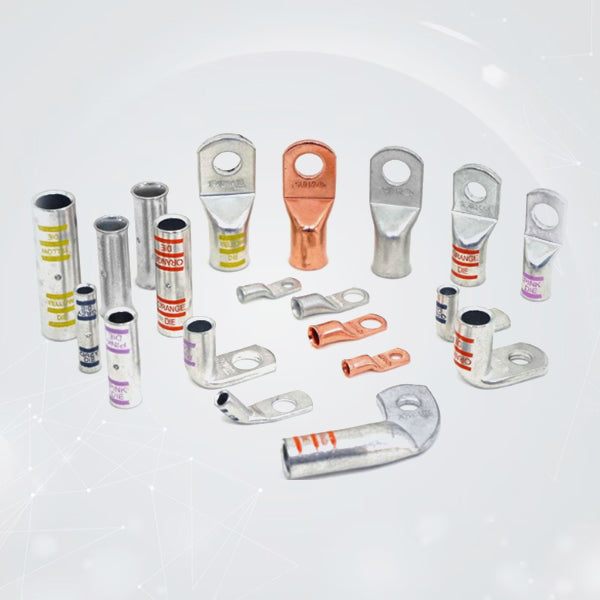


A Complete Guide to 8 AWG Lug Sizes and Specifications
If you have ever tried to hook up a high-performance car audio amplifier, wire a dual-battery system inside a custom camper van, or route an auxiliary solar charge controller, you know exactly how popular 8 AWG wire is. It is one of the most practical mid-gauge electrical sizes out there, but termination errors happen constantly. Grab an undersized 8 awg copper lug barrel, and you will find yourself trimming away individual wire strands just to force it to fit—a shortcut that creates a dangerous electrical hot spot. Pick the wrong stud dimension, and the whole connection will wiggle loose under regular chassis vibration. Executing a clean, low-resistance installation requires understanding the precise mechanical properties of your terminal hardware to keep current moving safely.
When building heavy DC circuits, tiny sizing errors lead to expensive component failures. Let's dig directly into real 8-gauge specifications, see how stud configurations alter your physical layout, and look at the right way to achieve a rock-solid crimp that lasts.
Deciphering the 8 AWG Blueprint: Dimensions That Matter
To keep a high-amp circuit working without generating destructive heat, your terminal connector needs to fit your wire like a second skin. Under the standard American Wire Gauge system, an 8-gauge solid core conductor has a diameter of roughly 0.1285 inches (3.26 mm). However, if you are using flexible marine-grade wire or automotive battery cables, that single core is replaced by dozens or hundreds of incredibly fine, braided copper strands. This structural design adds flexibility but also increases the total outer diameter of the raw metal bundle.
Because of this physical strand expansion, premium 8 gauge battery lugs are manufactured with an explicit internal barrel diameter (ID) intended to accept the entire uninsulated wire end smoothly without catching. A true 8 AWG barrel usually features an inner diameter right around 0.17 to 0.18 inches.
Why does this tiny fraction of an inch matter so much? If you buy cheap, generic hardware stamped with random fractional numbers instead of true AWG sizes, the barrel will often be a sloppy fit. A loose barrel leaves hidden air voids inside the joint after you crush it. Those microscopic pockets trap humidity, accelerating internal corrosion and creating a localized resistance wall that starves your accessories of voltage.
The Stud Hole Dilemma: Matching Your Hardware Stack
Getting your wire cleanly inside the barrel is only half the battle; you still have to bolt that flat pad down to your battery switch, bus bar, or frame grounding spot. This is exactly where choosing your eyelet geometry matters. Finding the right 8 gauge lugs options means matching your existing terminal posts perfectly.
The most frequent stud hole dimensions you will run into for 8 AWG jobs include:
- #10 Stud (approx. 5 mm): Seen constantly on compact industrial relay blocks, marine electronic ground plates, and small barrier terminal strips.
- 1/4" Stud (approx. 6.4 mm): The standard layout for compact distribution blocks, smaller power inverters, and automotive body ground bolts.
- 5/16" Stud (approx. 8 mm): Highly common on medium-duty deep cycle battery posts, marine bus bars, and primary power studs.
- 3/8" Stud (approx. 10 mm): The classic sizing for large top-post automotive battery terminal clamps and heavy-duty marine selector switches.
Never try to cheat the system by throwing a wide stud hole (like a 3/8") over a narrow bolt (like a 1/4") just because it is what you have sitting in your shop tray. The loss of flat surface contact severely limits how much electrical current can cross the joint, leading to immediate heating under sustained loads.
Anatomy of a Pro-Grade Copper Connector
When pushing 40 to 60 amps through an 8-gauge power run, the base metal mixture of your terminal ends determines the ultimate safety of your build. Look for these specific quality indicators when sorting through your installation supplies:
|
Component Feature |
Pro-Grade Specification |
Engineering Benefit |
|
Material Base |
99.9% Pure Seamless Copper |
Delivers maximum electrical conductivity and keeps voltage drop to an absolute minimum. |
|
End Design |
Closed-Pad / Seamless Barrel |
Completely blocks moisture and oxygen from migrating into the raw wire strands from the tip. |
|
Wall Thickness |
Heavy-Duty Annealed Wall |
Prevents structural splitting or cracking during heavy mechanical crimping and high-vibration use. |
|
Plating Type |
Electro-Tinned or Bare |
Tinned plating stops saltwater oxidation; bare copper gives raw efficiency for dry interior runs. |
If you are running wires inside a fully dry, climate-controlled zone like a home audio cabinet or an interior utility closet, a solid, unplated copper connector offers fantastic conductivity and mechanical toughness. For layouts exposed to changing weather, engine grease, or road spray, stepping up to a tinned finish keeps your electrical paths clean for years.
Step-by-Step: Crafting a Flawless 8 AWG Mechanical Crimp
Using a pair of slip-joint pliers or a hammer and a chisel to flatten an electrical terminal is a surefire way to guarantee a roadside failure down the line. To assemble a connection that easily handles vehicle vibrations and shifting temperatures, use this shop-tested approach:
- Strip to Length: Use sharp wire strippers to pull off just enough insulation to match the deep depth of your terminal barrel. Watch close to ensure you don't nick or clip away any of those fine copper strands.
- Check the Fit: Push the bare wire all the way into the barrel. The outer jacket insulation should sit right against the lip of the terminal without leaving a noticeable gap of exposed copper wire showing.
- Use a Mechanical Crimper: Grab a heavy-duty rotary indent tool or a specialized hex crimper calibrated specifically for 8 AWG cable. A proper mechanical compression cold-welds the barrel and the copper wire strands together into a single chunk of metal, erasing any internal air pockets.
- Seal It Tight: Slide a short length of dual-wall, adhesive-lined heat shrink tubing over the barrel and onto the wire jacket. Melt it down evenly with a heat gun until the internal glue liquefies and squeezes slightly out of the edges, creating a waterproof shield against ongoing corrosion.
Choosing the Ultimate Foundation for Your Project
Taking those extra couple of minutes to track your actual wire gauge, cross-reference your stud diameters, and use highly conductive base hardware keeps your electrical system operating safely.
Whether you are rebuilding a classic off-road rig or sorting through the perfect bare copper lugs for a clean, indoor power-distribution layout, starting with commercial-grade connection points saves you from massive troubleshooting headaches later on. Don't compromise your hard work with loose fitting or low-grade hardware—stop by the Selterm 8 AWG Product Interface to pick up the pro-grade, heavy-wall 8 awg lug components engineered to keep your power delivery stable under pressure.