

A Complete Guide to Solar Panel Grounding Lug Installation
Ever walk an array after a storm and find one panel frame carrying stray voltage nobody noticed for months? That's a grounding problem, and it's fixable before it ever gets that far.
Short punch: skip grounding, and you're building a liability into your own array.
Ungrounded metal frames can build up stray charge over time. Left alone, that charge eventually finds a path to ground on its own terms, usually through a fault, a short, or a spark nobody wants near panel wiring.
A proper solar grounding lug bonds every frame and rail back to a single grounding path. That's not a nice extra step tacked onto the install. It's the difference between a system that fails safely and one that doesn't.
What You Need Before You Start
Pro tip: lay everything out before you climb onto the roof or into the array field.
You'll want your bare copper grounding wire, a hex crimp tool sized correctly, stainless hardware for the frame connection, and a torque wrench rated for small fasteners.
- Bare copper ground wire, correct gauge for your array size
- Hex or indent crimper matched to your lug barrel
- Stainless bolts, washers, and a calibrated torque wrench
- Wire brush for cleaning contact surfaces
Missing tools mid-install means climbing down twice. Stage it all first.
Picking the Right Lug for Your Array
Truth? Not every connector on the shelf is built for this job specifically.
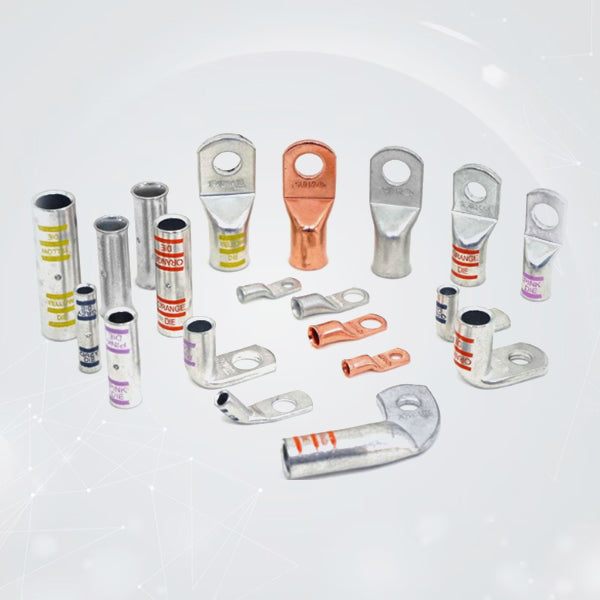
Solar panel grounding lugs need to handle UV exposure, temperature swings, and years outdoors without breaking down. Generic electrical lugs pulled from an unrelated project usually aren't rated for that kind of long-term weather beating.
Look for UL listing and NEC compliance on anything you're bonding to a frame. That listing isn't paperwork for the sake of paperwork, it confirms the lug's actually been tested for this exact application.
Prepping the Wire and the Rail
Medium thought: a clean connection starts before the crimper ever touches anything.
Strip only as much insulation as the lug barrel needs, usually a half inch or so. Nicked strands during stripping reduce your effective conductor size and quietly raise resistance.
On the rail side, scrub the contact surface with a wire brush until bare metal shows through any oxide layer or paint coating. Crimping onto a dirty or painted surface defeats the entire purpose of bonding it in the first place.
The Crimp: Where Most Installs Go Wrong
I've fumbled a crimp before, strands cut clean through from a worn die edge that should've been replaced months earlier.
Use a hex or indent crimper matched specifically to your lug size, never pliers or a generic tool grabbed off the bench.
A proper crimp on solar wire lugs compresses evenly around every strand inside the barrel. No gaps, full metal contact, one continuous path for fault current to travel if it ever needs to.
Bonding to the Frame Correctly
Here's the physics kept simple: more surface contact means less resistance at the bond point.
Position the lug flat against clean, bare metal on the rail or frame, not angled or resting on a paint edge that'll flex loose over time.
Star washers under grounding lugs for solar panels help bite through any residual oxide layer as you tighten, giving you a genuine metal-to-metal bond instead of a connection resting on a thin film of corrosion.
Torque Specs and Contact Surface
Numbers worth knowing: most small grounding lug hardware torques somewhere in the 6 to 10 inch-pound range, though it varies by manufacturer spec.
Under-tightening leaves a loose bond that vibrates apart. Over-tightening can crack the lug or strip the threaded hole entirely, especially on thinner aluminum rail material.
- Check manufacturer torque specs before tightening anything
- Use a calibrated torque wrench, not a guess by feel
- Re-check torque after the first few weeks of thermal cycling
Skipping this step is how loose bonds show up a year later.
Weatherproofing the Connection
Sensory detail: a dab of anti-oxidation compound on the contact face keeps moisture from creeping back in after installation.
Outdoor arrays face rain, humidity, and temperature swings every single day of their service life. A bare connection left exposed will eventually oxidize, even with a solid initial crimp.
A thin protective coating over exposed metal adds real insurance without hurting the electrical bond underneath. It's a small step that pays off years down the line when nobody's inspecting connections weekly.
Inspection Schedule After Install
Real questions worth asking: when did you last actually check your grounding connections instead of assuming they're fine?
Annual inspection catches loosening, corrosion, or wear before it becomes an actual fault. Extreme weather zones or high-vibration mounting setups deserve more frequent checks than that baseline.
Look for green oxidation, loose hardware, or any visible gap at the bond point. Catching a failing connection during inspection beats discovering it during a fault event, every single time.
Final Check Before You Flip the Switch
Grounding lug installation isn't complicated, but it punishes shortcuts. Clean contact surfaces, correct crimps, and proper torque specs are the whole game.
Whether you're bonding a single rooftop panel or a full commercial array, the right solar panel grounding lugs paired with careful installation keep stray voltage exactly where it belongs, in the ground.
Do the prep work right, inspect on schedule, and your grounding system quietly does its job for decades without another thought.