

Common Mistakes to Avoid When Installing 6 AWG Tinned Electrical Lugs
Upgrading your electrical setup for medium-duty power distribution means stepping away from thin primary wiring. Whether you are wiring up an onboard marine battery charger, a solar charge controller, or a dedicated auxiliary fuse block in a custom truck build, 6 AWG wire is the industry standard for delivering high current safely over distance.
But managing 6-gauge wire is completely different from working with tiny electronics.
At this thickness, a loose connection becomes an immediate fire hazard. Squeezing a terminal with standard workshop pliers or beating it with a hammer on a concrete floor does not work. The joint is always the first spot to fail. Your circuit requires a perfect, airtight metal bond to transfer current without bottlenecking your voltage.
Learning how to avoid the most common installation pitfalls keeps your system running cool.
Getting the mechanical joint wrong brings immediate system trouble. Electrical resistance shoots through the roof, your components starve for voltage, and the terminal barrel can easily get hot enough to melt your wire insulation. When routing high-current lines through vibrating engine bays or damp utility spaces, installing a flawless 6 awg tinned lug setup is the only way to protect your equipment under full load.
The Reality of Retail Terminal Hardware
Look at the unbranded connectors sitting in clearance bins at local auto parts shops. Most of those generic options are cast from cheap zinc alloys or brittle brass blends with nothing but a thin cosmetic plating on the outside.
They snap under structural pressure.
The second you hit those cheap barrels with a professional crimping tool, they split open down the seam or crack across the mounting pad. Even if they somehow bolt down without breaking during installation, their actual electrical conductivity is garbage compared to pure copper.
Vehicle frame rails, engine bays, and damp equipment rooms are brutal on metal hardware. Temperatures swing wildly, forcing mismatched metals to expand and contract at completely different rates. Thin retail terminals warp under this constant physical stress. The mechanical grip on the wire relaxes, internal resistance shoots up, and the whole joint generates localized heat that can ruin expensive wiring harnesses.
Why Pure Copper Needs a Tin Coating
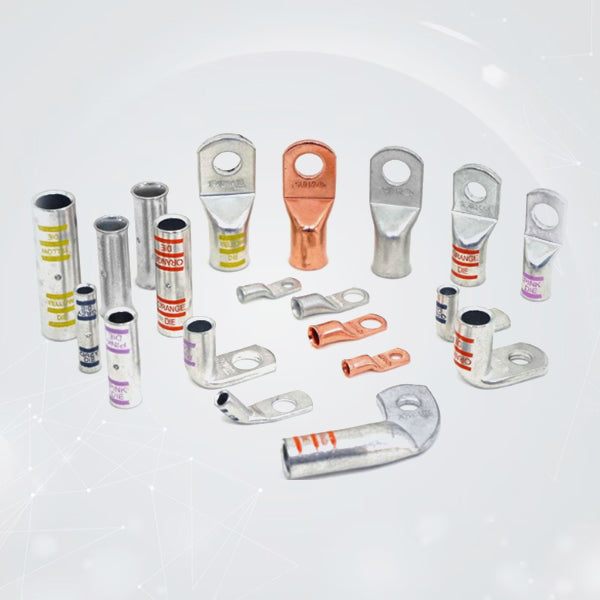
Long-term reliability comes down to the metallurgy. Industrial setups depend on connectors built from seamless C11000 electrolytic copper. This pure grade gives you the highest possible electrical and thermal conductivity. Because pure copper is naturally soft and workable, it crushes uniformly under heavy hydraulic tool pressure.
A seamless barrel flows right around the individual wire strands instead of splitting open along a weak seam. This compression fuses the wire and terminal into one solid block of copper with zero hidden air pockets inside.
The problem with raw, bare copper is oxidation. Leave it exposed to battery fumes, road grime, or damp air, and a green crust forms fast. That crust acts like an insulator and ruins electrical conductivity.
An electroplated layer stops that damage before it starts. Tin completely ignores moisture and acidic environments. A micro-thin layer of tin wraps the raw copper core to create an airtight seal. This plating keeps the underlying copper fully isolated so your 6 awg tinned copper lugs maintain their raw current-carrying capacity without ever touching the air.
Solder vs. Mechanical Crimping
An old repair trick that consistently ruins heavy wiring networks is using a propane torch and solder to secure cable connectors. Solder creates a clean-looking joint initially, but professional electrical standards ban the process for high-vibration applications.
As heat melts the solder into the terminal barrel, capillary action draws the liquid metal straight up the flexible stranded wire past the lug entry. Once cooled, the solder hardens, turning a flexible cable into a stiff, solid metal rod.
Engines shake and vehicles vibrate constantly. All that mechanical stress concentrates directly at the exact spot where the flexible wire insulation meets that rock-hard, soldered section. Over time, individual copper wire strands suffer from metal fatigue and snap clean off right at the back of the terminal barrel.
The industry standard for compliance is a gas-tight mechanical crimp. Forcing the barrel to compress uniformly from six sides cold-welds the wire strands directly to the inner walls, sealing out all air so interior rot cannot start.
The 6 AWG Crimp Process
1. Strip It to Bare, Bright Copper
Do not ever crimp over dark, corroded, or greasy wire strands. If the cable has been sitting around a damp shop, chop the bad ends off until you hit clean, bright metal. If it still looks a little dull, scrub the strands aggressively with a stainless steel wire brush. You want that copper shining before it goes anywhere near the barrel.
2. Check Your Depth
Slide the wire jacket back to match the depth of the lug barrel. Shove the wire all the way in until copper strands pack tightly against the inspection window. The leftover insulation jacket needs to sit flush against the back of the barrel—keep any gap under a sixteenth of an inch.
3. Use the Right Hex Die
Match your wire gauge exactly to the die on your crimping tool. No guessing here. Use a solid hydraulic or manual hex tool to crush the barrel completely. Let the tool go through its full mechanical cycle so it cold-welds the strands and terminal walls into a single, solid chunk of copper.
4. Bury the Joint in Glue-Lined Heat Shrink
Slide a piece of heavy-wall, 3:1 adhesive-lined heat shrink directly over the raw metal connection and hit it with a heat gun. Wait until the internal glue melts and squirt out around the bottom edges of the tubing. That squeezed-out glue is your proof—it creates a permanent, waterproof seal that stops road salt, pooling water, and engine grease from rotting your wires over time.
Long-Term Maintenance and Inspection Protocols
To keep a medium-duty power distribution system running at peak efficiency, implement a hands-on diagnostic check of your auxiliary circuits every few months. Rather than conducting a quick visual scan, physically grasp the lines near your 6 gauge tinned lugs and check for any structural shifting caused by continuous machinery vibrations or road harshness. Inspect the perimeter of the terminal pads for signs of micro-corrosion, dulling, or heat discoloration, which often signals a loosening mounting bolt. If you discover a compromised junction, tear down the connection entirely and restore the contact faces with isopropyl alcohol and a clean shop rag to preserve the integrity of the tin finish.
For absolute safety and structural longevity, avoid aggressive cleaning practices during routine hardware checks. Using coarse wire wheels, rough metal files, or sandpaper on a plated mounting pad strips away the critical electroplated topcoat, exposing the soft, underlying copper to immediate oxidation and severe voltage bottlenecks. If the plating on your 6 awg tinned copper lugs is flaking away, showing copper bleed-through, or warping from initial installation over-torque, discard the terminal entirely. Cutting the line back to clean, untarnished strands and processing a fresh compression joint is the only way to safeguard your secondary fuse blocks or solar controllers from sudden resistance spikes.
Heavy-Duty System Integration Support
A high-amperage network is only as stable as its primary contact interfaces. Settling for thin, low-cost connection ends on your main auxiliary paths introduces immediate voltage instabilities, starved accessories, and hours of frustrating tracking work when components fail under full load. If your build calls for heavy-duty hardware engineered to handle intense under-hood heat cycles and rugged field operations, upgrading to Selterm commercial-grade components offers the industrial-strength reliability your system requires. These terminals are machined from thick, seamless copper stock to provide excellent mechanical stability and uniform performance when compressed by heavy workshop tooling.
Replacing old, weathered factory terminations with premium 6 gauge tinned copper lugs components eliminates hidden circuit resistance and allows your charging systems to function without dropping power. Merging high-purity electrolytic copper substrate with an airtight electroplated outer barrier, exact hexagonal tool compression, and dual-wall, adhesive-backed heat shrink protection delivers a resilient, highly efficient power network built to operate flawlessly for decades.