

Common Signs Your Golf Cart Cable Lugs Need Replacement
A golf cart that suddenly loses its hill-climbing power or dies halfway across the course is a massive headache. Most owners immediately assume their expensive deep-cycle batteries are failing or that the electric motor is burning out. But there is a hidden culprit that gets ignored until you are completely stranded: the physical cable connections.
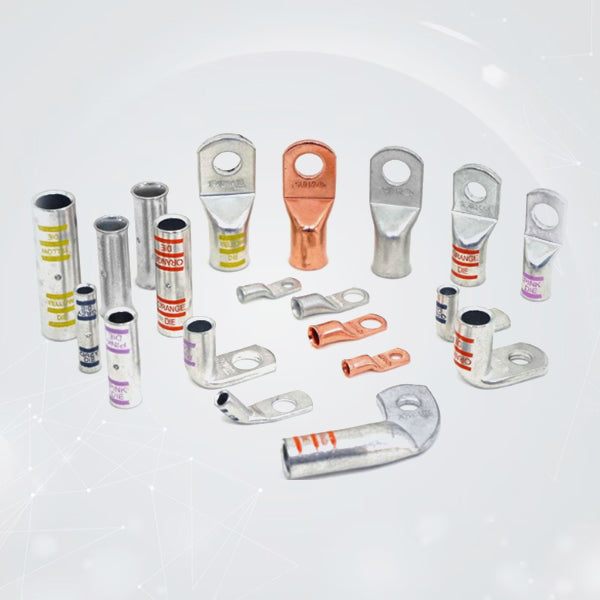
Golf cart motors draw massive amounts of continuous current to haul passengers up steep inclines. If the metal ends on your heavy battery cables are worn down or loose, it does not matter how new your batteries are. Current cannot bridge that physical gap efficiently. Over time, high heat, acid fumes, and chassis vibration destroy your factory connections. If you are dealing with sluggish acceleration or mystery power drops, identifying structural damage on your cable ends saves you from replacing perfectly good batteries. Upgrading old terminals with premium golf cart battery cable lugs ensures your cart always receives full operating voltage under heavy loads.
1. Cracking Across the Barrel or Mounting Pad
Take off your seat assembly and look closely at the flat face of the terminal where it bolts down onto the golf cart lug stud. Golf carts bounce and rattle over rough paths constantly, and this mechanical shaking combines with over-tightened mounting nuts to put immense structural stress on the metal. Cheap, thin-walled aftermarket terminals simply cannot handle that pressure.
If you spot hairline fractures along the flat mounting pad or where the barrel wraps around the wire strands, the terminal is compromised. Those cracks drastically reduce the surface area available to pass electrical current. Under heavy acceleration, the electrical bottleneck concentrates right at the fracture, turning the joint into a glowing hotspot that can melt your battery post right out of the plastic case. Switching to heavy-duty, seamless pure copper cable lugs fixes this vulnerability permanently. Hardware stamped from thick, seamless tubes handles extreme mechanical crushing forces from a hex crimper and resists splitting open under constant vibration.
2. Green, White, or Blue Crust Creeping Into the Strands
The most frequent warning sign of terminal failure under a golf cart seat is a fuzzy, colorful buildup coating the battery tops. This crust forms when acidic battery fumes escape during heavy charging cycles and react with raw environmental metals. While you can pour warm water and baking soda over the terminal to clean surface grime, the real damage happens where you cannot see it.
Once acid-driven oxidation gets inside the terminal barrel, it coats the individual wire strands in a layer of non-conductive crust. This hidden rot creates massive electrical resistance. The connection acts like a closed valve on a water line, starving your speed controller of current and converting your battery bank's energy into destructive heat. If cleaning the terminal pad reveals deep pitting, or if the wire strands inside look dull, dark, and brittle, you need to cut the cable back to fresh metal and install new golf cart cable lugs.
3. Melted, Bubbly, or Brittle Wire Insulation
Take a look at the protective plastic or rubber insulation jacket right where it meets the back of the metal terminal barrel. If that insulation looks charred, bubbly, distorted, or has turned rock-hard and brittle, your system has a serious heat problem. High electrical resistance generates extreme temperatures.
When a terminal joint is loose or corroded, it heats up rapidly every time you step on the accelerator pedal. That heat transfers straight down the cable, baking the protective insulation jacket until it cracks open. Exposed wire strands invite even more moisture, dirt, and battery acid into the core, accelerating the internal rot and increasing the risk of a catastrophic short circuit against your cart's metal frame.
4. Loose, Sloppy Fit on the Battery Stud
Sometimes a connection looks clean, but it feels loose no matter how hard you tighten the nut. This happens when low-grade terminal pads deform, stretch, or become deeply pitted from repeated installation and removal during routine battery maintenance. A loose connection is an active electrical hazard.
If the hole in the terminal pad has stretched out or ovaled, the mounting nut cannot apply even downward pressure across the joint. The terminal will wiggle on the stud, causing intermittent power loss, radio static, or sudden acceleration surges. When replacing or servicing your power lines, matching the internal pad diameter exactly to the battery stud size eliminates shifting and ensures full metal-on-metal current transfer.
The Golf Cart Crimp and Seal Process
- Strip It to Bare, Bright Copper: Do not ever crimp over dark, corroded, or greasy wire strands. If the cable is older or has been sitting in a damp garage, chop the bad ends off until you hit clean, bright metal. If it still looks a little dull, grab a stainless steel wire brush and scrub the strands aggressively. You want that copper shining before it goes anywhere near the barrel.
- Check Your Depth: Slide the wire jacket back to match the depth of the lug barrel. Shove the wire all the way in until copper strands pack tightly against the inspection window. The leftover insulation jacket needs to sit flush against the back of the barrel—keep any gap under a sixteenth of an inch.
- Use the Right Hex Die: Match your wire gauge exactly to the die on your crimping tool. No guessing here. Use a solid manual or hydraulic hex tool to crush the barrel completely. Let the tool go through its full mechanical cycle so it cold-welds the strands and terminal walls into a single, solid chunk of copper.
- Bury the Joint in Glue-Lined Heat Shrink: Slide a piece of heavy-wall, 3:1 adhesive-lined heat shrink tubing directly over the raw metal connection and hit it with a heat gun. Watch for the internal glue to melt and squirt out around the bottom edges of the tubing. That squeezed-out glue is your proof—it creates a permanent, waterproof seal that stops battery acid fumes, dirt, and pooling wash-water from rotting your wires over time.
Operational Interface Protection and Joint Preservation
Proactive oversight keeps your golf cart online over the long haul. Give every connection point under the seat a physical check at least once a season. Do not just glance at it from a distance. Get your hands in there. Check for lifting around the heat shrink edges or a dull, graying look on the metal surfaces. Wiping a little specialized dielectric paste or anti-corrosion spray over the bolted joint creates a solid backup boundary against the air.
If you have to pull a terminal off for a battery replacement or upgrade, clean the pad faces right down to the bright copper layer with a clean rag and some isopropyl alcohol. Ditch the sandpaper. Never touch a copper pad with a coarse file or heavy emery cloth. Aggressive scratching deep-pits the metal surface, creating tiny gaps that trap moisture and invite instant corrosion once everything is bolted back together. Scrap the worn hardware. If a terminal pad looks visibly gouged, warped, or shows deep green rot eating into the barrel entry, throw it in the scrap bin. Do not reuse it. Just cut the wire back to fresh strands and crimp a clean one into place.
Maximizing Fleet Performance Under Heavy Duty Cycles
Your cart's entire electrical performance relies on its worst connection point. Skimping on basic wire ends leads to sudden power drops, dead accessories, and hours of miserable diagnostic work in your garage. You do not want to deal with that. If you want hardware built to actually survive high electrical heat and brutal pathway vibrations, upgrading your underlying infrastructure with top-tier, heavy-walled golf cart battery cable lugs is vital.
Investing in hardware stamped out of 99.9% pure annealed copper tubes ensures maximum performance. This specific premium construction handles maximum crushing forces from a hex tool without splitting open or cracking down the side, ensuring maximum electrical conductivity. Swapping out old, sketchy factory ends for premium copper hardware stops resistance buildup and voltage drops right in their tracks. Pair these heavy-duty terminals with solid hex tooling and a proper piece of adhesive-lined heat shrink. You end up with a cool-running, highly efficient power setup that propels your cart flawlessly every single time for years.