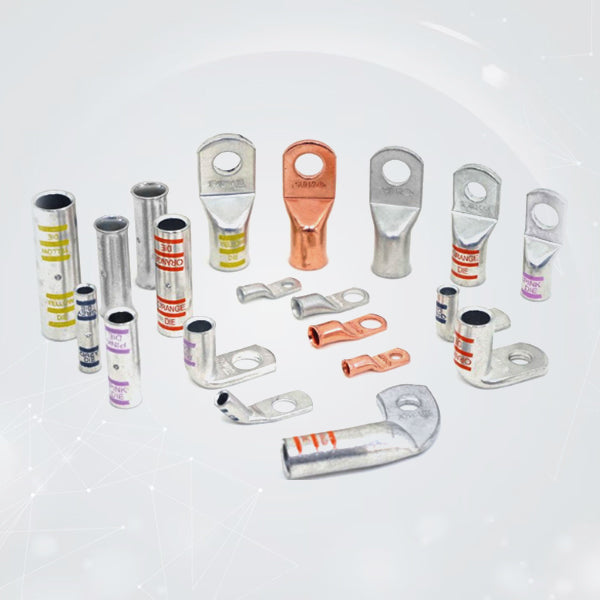


Quick Checklist: Everything You Need Before Terminal Wiring with 4 AWG Lugs
There is a point in almost every wiring project where the cable is ready, the battery is sitting nearby, and you realise you are missing something important.
Maybe the crimper is too small. Maybe the ring hole does not match the battery stud. Or maybe the only thing you have to cut the cable with is an old pair of pliers.
It is easy to think the actual job starts when you strip the cable. In reality, a good terminal connection starts with having the right parts and tools on the bench before you touch the insulation. That matters even more with 4 AWG lugs, as 4 AWG cable is used for applications where a poor connection can mean voltage drop, heat, intermittent power, or a connection that simply does not hold up.
Here is a checklist to run through before making your first connection.
Choose the Right Cable
Before choosing a terminal, check the cable itself.
A 4 AWG cable can look deceptively simple from the outside. It is just a thick insulated wire. But the conductor inside can vary considerably depending on the application and construction.
For battery connections, automotive wiring, marine projects, inverters and similar high-current applications, flexible copper cable is usually easier to work with since it bends around tight spaces and allows it to settle properly inside the terminal barrel during crimping.
Additionally ensure that you are working with copper cable rather than copper-clad aluminium as they may look similar when the insulation is still on, but they are not equivalent conductors.
Before cutting anything, check:
- Cable gauge
- Conductor material
- Strand construction
- Insulation condition
- Required cable length
Leave enough length for routing and movement. A cable that is technically long enough but pulled tight around a battery terminal is asking for unnecessary strain at the connection.
Pick the Terminal Before Stripping the Wire
This is where many DIY installations go slightly wrong.
You know the cable is 4 AWG, so you grab a terminal marked for the same gauge and assume the job is done. But the wire size is only one part of the selection.
The mounting hole needs to match the stud or bolt where the terminal will be installed.
That is why choosing the right 4 awg lugs means checking both ends of the connection:
Cable side: Does the barrel accept the complete conductor?
Equipment side: Does the eyelet fit the mounting stud?
Common stud sizes include 1/4 inch, 5/16 inch and 3/8 inch, along with metric equivalents such as M6, M8 and M10.
Do not rely on appearance. Measure the stud or check the manufacturer's specifications before ordering.
A terminal that fits the cable perfectly but has the wrong mounting hole is still the wrong terminal.
Check the Barrel Fit
Once you have the cable and terminal together, do a simple dry fit.
Strip only enough insulation to place the exposed conductor fully inside the barrel. You should not have to force the cable in, and you should not have to remove individual strands to make it fit.
That last point is important.
If the cable is too large for the barrel, cutting away strands is not a clever workaround. You have reduced the amount of copper carrying the current at exactly the point where you want a solid connection.
A good 4 awg connector lug should accept the stripped conductor cleanly, with the strands sitting together inside the barrel.
Check the following before crimping:
- The conductor enters without excessive force.
- All strands remain intact.
- The insulation sits close to the barrel entrance.
- The wire reaches the intended depth.
- The terminal eyelet is correctly oriented for installation.
This dry check takes less than a minute and can save you from cutting the cable twice.
Have the Right Crimper Ready
This is probably the tool that makes the biggest difference to the finished connection.
Heavy cable does not respond well to improvised crimping. A pair of pliers might squeeze the terminal enough to make it look secure, but appearance is not a reliable test of the connection.
For larger cable, use a crimping tool designed for the terminal and cable size. A hydraulic crimper with the correct die provides controlled compression around the barrel and creates a much more consistent result.
The important part is matching the die to the terminal.
Do not assume that one die setting works for every terminal simply because both are labelled 4 AWG. Terminal wall thickness and construction can vary between manufacturers.
Before starting:
- Confirm the cable size.
- Confirm the terminal size.
- Select the correct die.
- Check the crimper is in good working condition.
- Make sure the terminal is positioned correctly before applying pressure.
With 4 gauge cable lugs, the crimp itself is not something to rush. A clean, even compression is what gives the connection its mechanical strength.
Keep the Cable and Terminal Clean
A clean connection starts with clean metal.
Oil, dirt, oxidation and loose debris do not belong inside the terminal barrel. Wipe the exposed conductor before inserting it, especially if the cable has been sitting around the workshop for some time.
The same applies to the mounting surface.
If the terminal will sit against a battery post, busbar, switch or other electrical component, make sure the contact surfaces are clean and free from unnecessary contamination.
There is also a temptation to aggressively sand everything until it shines. That is not always necessary. The goal is a clean contact surface, not removing material for the sake of it.
Keep a few basic supplies nearby:
- Clean lint-free cloths
- Electrical contact cleaner or isopropyl alcohol
- Appropriate cable cutters
- Cable stripper
- Heat gun
- Adhesive-lined heat shrink
Having them within reach is much easier than stopping halfway through the job to search through a toolbox.
Get Your Heat Shrink in Place Early
This is the classic mistake that happens after a perfect crimp.
You finish the connection, look at the bench and realise the heat shrink is still sitting on the other side of the terminal.
Now you either have to remove the lug or live with an unsealed connection.
Slide the heat shrink onto the cable before making the crimp.
For applications exposed to vibration, moisture, engine bays or outdoor conditions, adhesive-lined heat shrink provides another layer of protection around the finished termination.
Choose tubing with enough diameter to slide over the cable and enough length to cover the back of the terminal and extend onto the cable insulation.
Do not overheat it. A heat gun gives you much better control than holding a lighter directly against the tubing.
The finished sleeve should sit firmly around the connection without burning, shrinking unevenly or damaging the cable insulation.
Check the Mounting Hardware
The crimp may be perfect, but the installation can still fail at the other end.
Before bolting your 4 awg ring lugs into place, check the hardware you are working with.
You need a suitable stud or bolt, washer arrangement and nut that matches the equipment manufacturer's requirements.
The terminal should sit flat against the contact surface. Avoid stacking unnecessary washers or other hardware between the terminal and its electrical contact point.
Torque matters too.
Over-tightening can damage battery posts, studs or terminal blocks. Under-tightening creates movement and resistance at the joint. Where the equipment manufacturer provides a torque specification, use it rather than relying on how tight the connection feels by hand.
Once everything is tightened, give the cable a gentle physical check. You are looking for a secure connection without putting excessive force on the terminal.
Five-Minute Bench Check Before You Start
Before making the first cut, run through the list one more time.
Cable
→ Correct gauge and conductor material
→ Enough length for the installation
→ No damaged insulation
Terminal
→ Correct cable size
→ Correct stud size
→ Barrel accepts all strands
→ Terminal is suitable for the environment
Tools
→ Proper cable cutter and stripper
→ Correct crimping tool and die
→ Heat gun
→ Torque wrench where required
Finishing
→ Heat shrink already on the cable
→ Contact surfaces clean
→ Mounting hardware ready
It sounds basic, but this small check is what separates a straightforward wiring job from one that gets taken apart halfway through.
Build the Connection Once, and Build It Properly
Most terminal problems do not start with some dramatic electrical failure.
They usually start with a shortcut.
A cable gets stripped with a knife. A few strands are accidentally cut. The terminal is squeezed with whatever tool is available. Heat shrink gets forgotten. The mounting nut is tightened by feel.
Each shortcut seems harmless on its own.
Put several of them together and you have a connection that may work today but becomes a problem later.
Taking a few minutes to prepare the cable, select the correct terminal, use the right crimping tool and seal the finished joint gives you a much better starting point.
For projects that rely on dependable high-current connections, Selterm's 4 AWG bare copper lugs are designed for applications where the termination needs to be treated as an important part of the electrical system, not just the piece at the end of the cable.