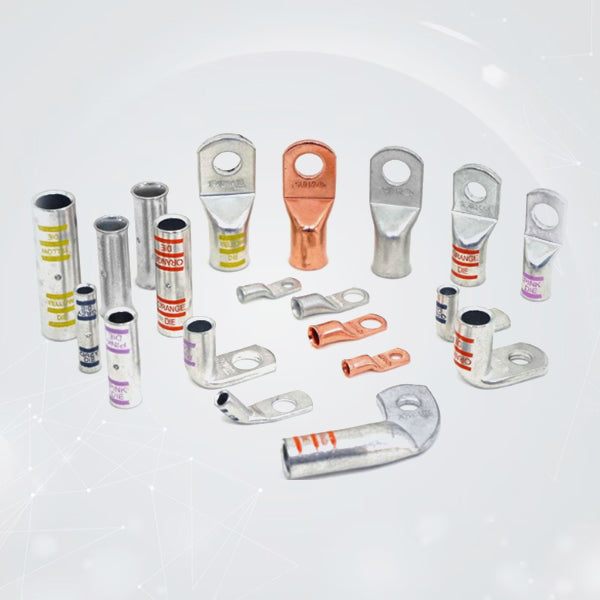


The Right Way to Measure Cable Gauge for 90-Degree Copper Lugs
Routing thick power cables through tight spots like firewall gaps or cramped battery boxes is a total nightmare. Try forcing a heavy cable into a sharp bend. You strain the copper strands, stress the terminal, and crack the plastic insulation jacket wide open. Straight connectors are completely useless when you run out of physical room.
When space is tight, a pre-formed 90 degree battery terminal is the only correct way to redirect a heavy circuit. It stops you from putting constant tension on the joint. These right-angle fittings let the cable run flush against a wall or mounting surface, keeping the layout clean and saving the connection from vibration fatigue.
Do not guess on the sizing, though. A mistake with the cable gauge or the barrel size creates immediate bottlenecks. You need a tight, metal-on-metal connection to pass heavy current without creating hot spots or dropping voltage inside an enclosed space.
The Danger of Guessing Wire Gauges
Look at the heavy cabling on industrial setups, winches, or solar arrays. You cannot judge the wire size by looking at the outside of the plastic jacket. Insulation types change the physical thickness of the cable completely.
A standard automotive battery cable with thick PVC can look identical to a high-flex welding cable or a dense marine wire. But the actual copper core inside is completely different. If you buy a battery terminal 90 degree fitting based on how thick the wire looks from the outside, the barrel will either be too loose to crimp or too small to even fit the strands.
Loose barrels kill systems. The crimper cannot crush the metal evenly, which leaves hidden air pockets between the strands. That loose contact acts like a bottleneck, starving your gear of voltage and turning electrical energy into raw heat.
Why Pure Copper Needs a Tin Coating
Long-term reliability comes down to the metal structure. Heavy-duty setups depend on connectors built from seamless C11000 electrolytic copper. This pure grade gives you the highest possible electrical and thermal conductivity. Because pure copper is naturally soft and workable, it crushes uniformly under heavy tool pressure.
A seamless right-angle barrel flows right around the individual wire strands instead of splitting open along a weak seam. This compression fuses the wire and terminal into one solid block of copper with zero hidden air pockets inside.
The problem with raw, bare copper is oxidation. Leave it exposed to battery fumes, road grime, or damp air, and a green crust forms fast. That crust acts like an insulator and ruins electrical conductivity.
An electroplated finish stops that damage before it starts. Tin completely ignores moisture and acidic environments. A micro-thin layer of tin wraps the raw copper core to create an airtight seal. This plating keeps the underlying copper fully isolated so your 90 degree battery lugs maintain their raw current-carrying capacity without ever touching the air.
Sizing for Tight Spaces
Switching to a right-angle layout means you have to measure two things: the wire gauge and the physical clearance around the mounting stud. A straight terminal only needs flat surface area. A bent terminal swings the cable down or sideways, so the barrel has to clear whatever is next to it.
|
Wire Gauge (AWG) |
Nominal Copper Core Diameter |
Common Stud Sizes |
Best Tooling Type |
|
4 AWG |
0.204 Inches |
1/4", 5/16", 3/8" |
Manual Mechanical Hex |
|
2 AWG |
0.258 Inches |
5/16", 3/8" |
Heavy Manual / Hydraulic |
|
1/0 AWG |
0.325 Inches |
5/16", 3/8", 1/2" |
Hydraulic Hex Die |
|
2/0 AWG |
0.365 Inches |
3/8", 1/2" |
Hydraulic Hex Die |
Check the spacing around the terminal pad before ordering hardware. Do not try to solve a clearance issue by combining a straight terminal with a flimsy 90 degree battery terminal adapter. Every extra bolt-on piece adds another mechanical failure point to the circuit, doubles the risk of things loosening up from vibration, and drops your voltage.
The Right-Angle Crimp Process
1. Strip It to Bare, Bright Copper
Do not ever crimp over dark, corroded, or greasy wire strands. If the cable has been sitting around a damp shop, chop the bad ends off until you hit clean, bright metal. If it still looks a little dull, scrub the strands aggressively with a stainless steel wire brush. You want that copper shining before it goes anywhere near the barrel.
2. Check Your Depth
Slide the wire jacket back to match the depth of the lug barrel. Shove the wire all the way in until copper strands pack tightly against the inspection window. The leftover insulation jacket needs to sit flush against the back of the barrel—keep any gap under a sixteenth of an inch.
3. Use the Right Hex Die
Match your wire gauge exactly to the die on your crimping tool. No guessing here. Use a solid hydraulic or manual hex tool to crush the barrel completely. Let the tool go through its full mechanical cycle so it cold-welds the strands and terminal walls into a single, solid chunk of copper.
4. Bury the Joint in Glue-Lined Heat Shrink
Slide a piece of heavy-wall, 3:1 adhesive-lined heat shrink directly over the raw metal connection and hit it with a heat gun. Wait until the internal glue melts and squirt out around the bottom edges of the tubing. That squeezed-out glue is your proof—it creates a permanent, waterproof seal that stops road salt, pooling water, and engine grease from rotting your wires over time.
Shop Maintenance Rules
Preventative care keeps your electrical system online over the long haul. Give every connection point a physical check once a season. Do not just glance at it. Get your hands in there. Check for lifting around the heat shrink edges or a dull, graying look on the metal surfaces.
Wiping a little specialized dielectric paste or anti-corrosion spray over the bolted joint creates a solid backup boundary against the air.
If you have to pull a terminal off for an upgrade, clean the pad faces right down to the bright tin layer with a clean rag and some isopropyl alcohol.
- Ditch the sandpaper. Never touch a tinned pad with a coarse file or heavy emery cloth. Aggressive scratching scrapes that thin protective tin layer right off the metal, exposing raw copper and inviting instant green rot.
- Scrap the worn hardware. If the tin looks visibly gouged, flaked off, or shows red copper bleeding through, throw it in the scrap bin. Do not reuse it. Just cut the wire back and crimp a fresh one into place.
Right-Angle Hardware Solutions
An electrical setup fails the moment its weakest connection point gives out. Skimping on basic wire ends leads to sudden power drops under heavy loads, fried components, and hours of brutal diagnostic work down the road.
If you want hardware built to survive extreme engine temperatures and constant chassis vibrations, the options found in the Selterm 90-Degree Collection are built for those exact conditions. These are manufactured from seamless copper tubes with thick, precision-machined flat pads. They take maximum crushing forces from a hydraulic tool without splitting open or cracking down the side.
Upgrading the main power connections with premium hardware eliminates the risk of resistance build-up, sudden voltage drops, and structural metal failures. Integrating high-purity copper metallurgy with a premium finish, professional hexagonal tooling, and a proper adhesive-lined heat shrink seal provides a cool-running, highly efficient power network that runs safely for decades.