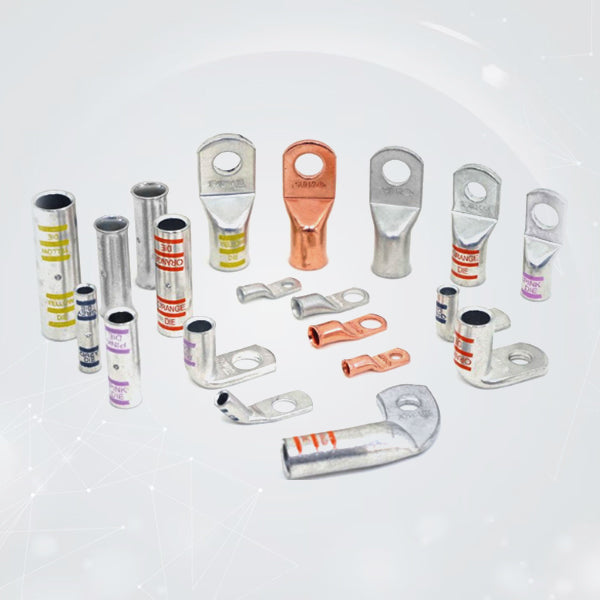


Torque Specs and Maintenance Tips for High-Amp 2 AWG Cable Lug Connections
A properly crimped battery cable can cause weaker connections if the connection at the other end is loose.
That is the part that often gets overlooked. The cable is heavy, the lug looks substantial, the crimp feels solid, and everything appears ready to go. Then vibration, heat cycles and repeated current loads start working on the connection.
With a high-current electrical system, small things matter.
A loose terminal creates resistance. Resistance creates heat which can accelerate corrosion and loosen the connection even further. It becomes a cycle that is much easier to prevent than to repair.
This is why installing 2 awg cable lugs is only one part of the job. The connection also needs the correct mounting hardware, proper torque and occasional inspection.
Start With the Correct Lug and Stud Combination
Before reaching for the torque wrench, ensure the hardware works together.
A 2 AWG cable needs a terminal designed to match its compatible counterpart. The mounting hole also needs to match the stud or bolt on the battery, busbar, inverter, switch or other equipment.
For example, Selterm's 2 AWG bare copper lug is available with a 3/8-inch (M10) stud and a wide pad designed to provide a larger clamping surface.
Other installations may use 5/16-inch (M8), #10 (M5) or other stud sizes. Selterm's 2 AWG tinned versions, for example, are available for different stud configurations rather than forcing one terminal size to fit every application.
The basic rule is simple:
Match the cable gauge to the barrel. Match the stud hole to the equipment.
Do not make a hole with a drill or squeeze an oversized terminal onto a smaller stud.
What Torque Actually Does
Torque is simply the twisting force used to tighten a fastener.
In a battery connection, the goal is not to tighten the nut as hard as physically possible. You want enough clamping force to hold the lug firmly against the contact surface without damaging the stud, nut, battery terminal or lug.

This is why there is no single universal torque figure for every 2 awg wire lugs installation.
The correct value depends on the component being fastened. A battery manufacturer may specify one value, while a busbar, circuit breaker or inverter manufacturer may specify another.
Always use the manufacturer's specifications guide for the actual stud and hardware you are tightening.
If a specification is provided in specific measurements, do not casually substitute a number. The units matter.
And if you are working on an unfamiliar piece of equipment with no accessible specification, it is better to find the manufacturer's documentation than guess.
Keep the Lug Flat Against the Contact Surface
A torque wrench cannot fix poor contact between two surfaces.
Before tightening a 2 gauge terminal lug, look at how it sits on the stud. The flat pad should lie properly against the intended contact surface without rocking or sitting at an angle.
Watch for:
-
Dirt or oxidation between the contact surfaces
-
A washer trapped where the lug should make contact
-
A stud that is too short for the hardware stack
-
A lug that is forced sideways by the cable
-
A mounting hole that is much larger than the stud
Cable routing matters here too.
If the cable is pulling sideways on the terminal, the lug may move every time the cable is pushed or pulled. In a vehicle, that movement can happen hundreds of times as the chassis vibrates.
Leave enough slack to route the cable naturally without allowing it to flop around.
The terminal should be carrying the electrical connection, not acting as a cable anchor.
Do Not Confuse Crimp Quality With Mounting Torque
There are two different mechanical connections in a finished battery cable.
The first is the crimp between the cable and the lug.
The second is the bolted connection between the lug and the equipment.
They need to be treated separately.
A good crimp should compress the cable strands evenly inside the barrel. Selterm recommends proper mechanical crimping for its 2 AWG products rather than relying on improvised tools or solder.
Once the crimp is complete, the lug is then secured to the battery post, busbar or other equipment using the appropriate fastener and torque specification.
Do not compensate for a questionable crimp by tightening the mounting nut harder.
It will not fix the connection inside the barrel.
Inspect the Connection Before Applying a Heavy Load
Before switching on a large inverter, winch or other high-current equipment, take a few minutes to inspect the finished termination.
Look at the crimp first.
The barrel should be evenly compressed, without obvious cracks, severe distortion or loose strands. Give the cable a firm hand check. It should not move independently inside the lug.
Then inspect the mounting side.
The lug should sit flat. The nut should be properly seated, and there should be no visible movement at the joint.
This is especially important when working with 2 awg copper lugs on equipment that experiences vibration.
Selterm's 2 AWG 5/16-inch tinned copper lug, for example, is specified for 2 AWG cable and M8 studs and carries a listed maximum current of 190 A, with UL and SAE standards identified for that product.
The actual allowable current in a complete installation still depends on the cable, insulation, length, temperature, installation method and equipment involved. A lug rating should not be treated as the rating of the entire circuit.
Give High-Current Connections a Regular Check
Maintenance does not need to become a weekly ritual.
For a dry, protected installation that rarely moves, periodic inspection may be enough. A battery bank inside an RV, work vehicle or workshop can be checked during normal electrical maintenance.
For equipment exposed to vibration, moisture, road salt, engine heat or frequent movement, inspect connections more often.
During an inspection, look for:
-
Loose nuts or fasteners
-
Discoloration around the lug
-
Melted or hardened insulation
-
Green corrosion on bare copper
-
Cracked heat shrink
-
Frayed cable strands
-
Movement around the crimp
-
Heat marks on nearby insulation
A connection that is noticeably hotter than the cable around it deserves attention.
Do not simply tighten everything you find. First determine why the connection has loosened or overheated. The problem could be poor crimping, cable movement, an incorrect terminal, contamination between surfaces or an electrical load beyond what the installation was designed to handle.
Bare Copper or Tinned Copper?
The environment should influence the finish you choose.
Bare copper is the perfect choice for dry, protected installations due to its long term durability. It offers good conductivity and works well inside protected battery compartments, equipment cabinets and similar environments.
For marine applications, outdoor installations or areas exposed to moisture and salt, tinned copper is generally the better option because the tin coating helps protect the copper from corrosion. Selterm offers both bare and tinned 2 AWG options for different installation conditions.
The important point is not choosing the most expensive terminal.
It is choosing one that suits where the cable is actually going to live.
A Simple Maintenance Routine
You do not need a complicated inspection procedure.
Every time you service the battery or electrical system:
1. Look
Check the lug, cable insulation, heat shrink and mounting hardware.
2. Touch
With the system safely powered down, check for movement in the cable or terminal.
3. Check
Inspect for corrosion, discoloration or damaged insulation.
4. Verify
If a connection has been disturbed, check the manufacturer's torque specification before tightening it again.
5. Replace when necessary
Do not keep reusing a lug that is cracked, badly deformed, overheated or damaged from previous installation work.
A terminal is a relatively small component compared with the equipment it connects.
It is not worth gambling on a damaged one.
The Connection Deserves as Much Attention as the Cable
High-current wiring tends to get judged by the size of the cable. A thick cable looks reassuring.
But the current still has to pass through every termination along the way. One poor connection can undermine an otherwise well-built electrical system.
Good installation comes down to a few habits: use the correct cable and terminal combination, make a proper crimp, keep the contact surfaces clean, route the cable without putting unnecessary strain on the 2 awg copper lugs, and tighten the mounting hardware to the equipment manufacturer's specified torque.
Then inspect it from time to time.
Explore Selterm's 2 AWG bare copper cable lugs for heavy-current battery, automotive, RV, solar and other protected electrical applications. The right terminal is only part of the job, but it is a part worth getting right.