

What Is the Difference Between Positive and Negative Battery Cable Ends?
Staring down at a corroded battery bank in a boat bilge or a truck engine bay can make you realize how much rides on two chunks of metal. You are looking at a classic electrical crossroad, and getting it wrong is a fast track to fried alternators, melted insulation, or worse. While the copper wires inside the insulation look exactly the same, the battery cable ends that terminate them serve completely opposite roles in your DC electrical system.
Understanding the structural, mechanical, and safety differences between positive and negative battery clamps is not just trivia. It is what keeps your off-grid solar system, overland rig, or boat from becoming an expensive smoke show.
The Physical Differences: Size and Markings
At first glance, standard top-post battery configurations look identical, but manufacturers build a subtle mechanical safety feature right into the lead posts. The positive post is physically larger in diameter than the negative post. Consequently, dedicated positive terminal connectors have a slightly larger clamping inner diameter to match. If you try to force a negative clamp onto a positive post, it will spread the metal thin and likely crack the casting. Try to put a positive clamp on a negative post, and it will never tighten down enough to crank the starter.
Aside from physical sizing, color-coding and stamped symbols are your primary visual indicators. Positive ends are almost always paired with red heat shrink, a red protective boot, or a stamped plus (+) sign. Negative ends lean on black insulation and a stamped minus (-) sign. I have seen plenty of older project trucks where a previous owner used whatever color scrap wire they had lying around on the workbench, so tracking down the physical size or stamped markings is always the safest bet.
System Pathing: Where the Current Flows
To grasp why the ends matter, you have to look at where the heavy-gauge cables actually go. The positive cable acts as the supply line for your entire DC grid. It snakes away from the battery and connects directly to high-load components like the starter solenoid, the alternator output, or the main fuse block. Because this wire is always "live" with potential energy, the cable connections on this side require robust insulation to prevent accidental grounding.
The negative cable has a completely different destination: the chassis. In almost all modern vehicles and heavy equipment, the entire metal frame or engine block acts as the electrical return path, known as a negative ground system. The negative cable end connects via a short, heavy wire bolted directly to clean, bare metal on the frame or engine block. This completes the circuit loop.
In marine applications, you cannot ground to a fiberglass or wood hull, so the negative battery studs route back to a centralized negative bus bar, but the operational rule remains identical.
Why Connection Order Can Save Your Wrench
The difference in how these cables route explains the strict, non-negotiable rule of battery maintenance: always disconnect the negative terminal first, and always connect it last. Most people skip this logic until they drop a wrench and see sparks fly.
If you put your wrench on the positive terminal while the negative cable is still hooked up, the entire metal chassis surrounding you is a live ground. Slip just an inch, and if your metal tool touches the positive post and the metal frame at the same time, you create a direct dead-short circuit. The wrench will instantly heat up to glowing temperatures, weld itself to the frame, and potentially cause the battery to crack or explode.
By removing the negative cable end first, you break the connection to the frame. If your wrench bumps the metal body while loosening the negative side, nothing happens because they are already at the same electrical potential. Once that negative cable is safely tucked away, the frame is no longer part of an active circuit, making it safe to work on the positive side.
Material Selection for Cable Terminations
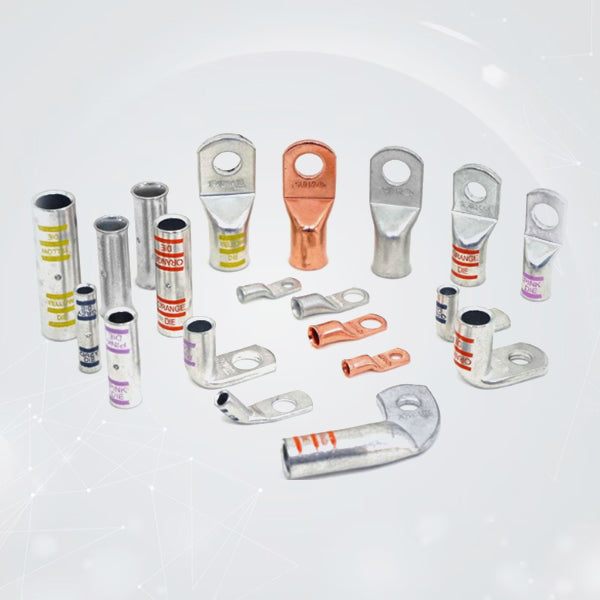
Whether you are building a custom dual-battery setup for overlanding or rewiring a boat bilge, standard lead-alloy automotive clamps are not always your best choice. For heavy-duty low-voltage builds, using high-conductivity copper lugs that are crimped and sealed is a much cleaner approach.
- Bare Copper Lugs: Excellent for dry, protected environments like vehicle cabs or indoor solar battery enclosures. They provide maximum electrical conductivity but will oxidize over time if exposed to moisture.
- Tinned Copper Lugs: The standard for marine and outdoor environments. The micro-thin tin plating shields the copper from salt air and moisture, preventing the slow oxidation that turns a solid joint into a high-resistance bottleneck.
Pairing these heavy copper pieces with adhesive-lined heat shrink tubing seals out environmental grime and provides structural strain relief where the wire meets the barrel. For high-vibration environments like off-road trucks or boats, swapping a standard post clamp for heavy-duty stud-top batteries allows you to lock down your connections with a locking nut, ensuring the joint never vibrates loose on a washboard road.
Summary of Key Differences
|
Feature |
Positive Cable End (+) |
Negative Cable End (-) |
|
Standard Color |
Red |
Black |
|
Post/Clamp Size |
Slightly larger diameter |
Slightly smaller diameter |
|
Routing Destination |
Starter motor, alternator, fuse box |
Vehicle chassis, engine block, or bus bar |
|
Handling Sequence |
Connect first / Disconnect second |
Disconnect first / Connect last |
No matter which side of the battery you are servicing, treating your heavy-duty ring terminal connectors as foundational safety components keeps your system running efficiently. Taking the time to properly size your wire, use appropriate marine-grade tinned components, and seal the connection properly prevents the kind of roadside voltage drops that leave you stranded.