
Crimping Best Practices for Tinned Copper Lugs in Heavy-Gauge Cables
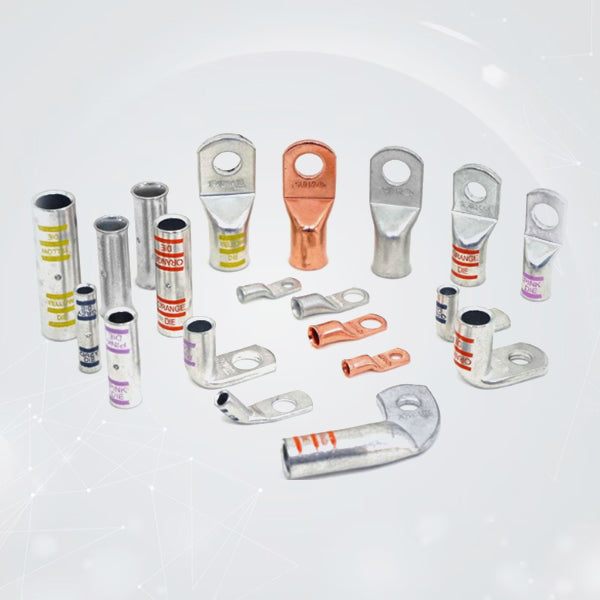
Tinned copper lugs provide excellent corrosion resistance for marine, solar, and battery applications. Heavy-gauge cables (4 AWG through 4/0) demand precise crimping techniques. Poor crimps create high resistance connections that overheat and fail prematurely. Proper methods ensure tinned copper wire lugs, tinned copper cable lugs, and tinned copper battery lugs deliver maximum performance and longevity.
These best practices apply specifically to tinned copper construction and large cable sizes. Correct execution creates gas-tight, mechanically strong connections rated for continuous high current.
Tool Selection for Heavy-Gauge Tinned Copper Lugs
Proper tooling creates uniform compression essential for tinned copper's thin plating.
Recommended tools:
- Hexagonal die crimper (preferred): Even 360° compression preserves tin plating
- Indent crimper: Acceptable with proper technique
- Hydraulic crimper (4 AWG+): Consistent force for largest sizes
Avoid:
- Vise grips or pliers (uneven pressure damages tin layer)
- Hammer crimping (uncontrolled force cracks plating)
- Undersized dies (cut strands, expose copper)
Die sizing: Match exactly to cable gauge. 2 AWG die will not properly compress 4 AWG cable.
Cable Preparation Ensures Perfect Fit
Heavy-gauge stranded cable requires careful preparation for tinned copper cable lugs.
Step-by-step:
- Cut square: Use cable cutter, not hacksaw (avoids strand crushing)
- Strip precisely: 3/4" to 1" insulation removal (matches lug barrel length)
- Inspect strands: Remove damaged or broken wires
- Lightly twist: Form strands into tight bundle (prevents fanning during insertion)
- Avoid tinning strands: Solder weakens flexibility, creates hard spots
Critical check: All strands must enter barrel. Stragglers create hot spots.
Full Barrel Insertion Creates Gas-Tight Seal
Tinned copper wire lugs require complete conductor insertion.
Positioning rules:
- Insulation touches open barrel end
- No copper strands visible behind lug
- Stranded bundle fills 90-95% of barrel ID
- Inspection hole (if present) shows insulation
Verification:
- Gently rotate cable (no movement inside barrel)
- Hand tug test (should resist firm pull)
- Visual gap check (zero space between cable and barrel mouth)
Partial insertion leaves air gaps. Resistance increases 3-5X. Heat generation follows.
Single Center Crimp Preserves Tin Plating
Heavy-gauge tinned copper battery lugs use one properly placed crimp.
Execution:
- Position lug in die center
- Align crimp over barrel midpoint
- Apply steady, full ratchet pressure
- Release only after complete compression
Crimp profile characteristics:
- Smooth, uniform barrel (no bell mouth)
- Even hexagonal pattern (hex die)
- Slight material flow at crimp edges
- No cracks or tears in tin plating
Avoid double crimping same location. Over-compression fractures tin layer, exposes copper.
Heat Shrink Application Seals Connection
Adhesive-lined heat shrink protects tinned copper lugs crimps from environmental damage.
Proper application:
- 3:1 or 4:1 ratio (handles heavy wall thickness)
- Position before crimping (slide over cable first)
- Full coverage: 1" cable + complete lug + 1/2" palm
- Even heat application (rotating heat gun, 250-300°F)
Benefits:
- Waterproof seal prevents corrosion creep
- Strain relief resists flex fatigue
- Adhesive bonds cable to lug permanently
Red flag: Bubbles, burns, or gaps indicate overheating or poor positioning.
Stud Installation and Torque Specifications
Tinned copper cable lugs require precise stud mounting.
Preparation:
- Clean stud/terminal (wire brush removes oxidation)
- Apply antioxidant compound (marine/outdoor only)
- Use star lock washer (vibration resistance)
Torque values by stud size:
- 1/4": 75 in-lbs
- 5/16": 120 in-lbs
- 3/8": 200 in-lbs
- 1/2": 300 in-lbs
Over-torquing strips threads or deforms lug palm. Under-torquing allows arcing.
Quality Verification Tests
Every tinned copper battery lug crimp deserves validation.
Mechanical tests:
- Pull test: 100+ lbs resistance minimum
- Twist test: No rotation by hand
- Bend test: 90° without cracking
Electrical tests:
- Continuity: <0.1 ohm end-to-end
- Heat rise: <50°C at rated current
- Voltage drop: <0.1V at full load
Visual inspection:
- Smooth crimp profile
- Intact tin plating
- Secure heat shrink adhesion
- Proper stud fit
Common Heavy-Gauge Crimping Failures
Problem: Barrel bell mouth
- Cause: Too much wire, wrong die
- Fix: Correct strip length, proper die
Problem: Cut strands
- Cause: Undersized die, over-crimp
- Fix: Match die to exact cable gauge
Problem: Loose crimp
- Cause: Partial insertion, under-crimp
- Fix: Full insertion, complete ratchet cycle
Problem: Cracked tin plating
- Cause: Hammer crimping, double crimp
- Fix: Hex die, single proper crimp
Cable Type Specific Techniques
Welding cable (1000+ strands):
- Smaller ID barrel dies
- Extra twist before insertion
- 3:1 adhesive shrink mandatory
Battery cable (19-41 strands):
- Standard barrel dies
- Square cut essential
- Medium adhesive shrink sufficient
Solar PV cable (Class K stranding):
- Tinned tinned copper wire lugs only
- XLPE insulation requires heat protection
- UV-resistant heat shrink
Maintenance Extends Crimp Life
Annual inspection checklist:
- Visual: Discoloration, arcing marks
- Mechanical: Tug/twist resistance
- Thermal: Infrared scan (<50°C rise)
- Torque: Retighten to specification
Environmental protection:
- Marine: Replace heat shrink every 3 years
- Solar: Clean corrosion annually
- Engine bay: Check quarterly
Performance Comparison Table
| Crimping Method | Resistance | Heat Rise (150A) | Pull Strength | Lifespan |
| Proper Hex Die | 0.04 mΩ | 25°C | 300 lbs | 10+ years |
| Indent Die | 0.06 mΩ | 35°C | 250 lbs | 7-10 years |
| Pliers | 0.25 mΩ | 85°C+ | 75 lbs | 6-18 months |
| Hammer | 0.18 mΩ | 65°C | 100 lbs | 1-3 years |
Final Thoughts
Crimping tinned copper lugs demands precision. Heavy-gauge cables carry serious current. Small errors create large consequences.
Best practices summary:
- Matched dies and proper tools
- Full strand insertion
- Single centered compression
- Adhesive heat shrink sealing
- Correct torque specifications
- Post-crimp verification
Tinned copper wire lugs, tinned copper cable lugs, and tinned copper battery lugs excel when crimped correctly. Connections run cooler. Systems last longer. Performance remains consistent.


