
How to Achieve a Perfect Crimp with an 8 AWG Cable Lug
8 AWG wire works well for many projects. Car audio amplifiers, small solar charge controllers, and dual-battery overland rigs all benefit from its balance of power and flexibility. The wire handles 50 to 60 amps over typical distances. Voltage drop stays low. It bends easily through firewalls or around battery trays.
The lug crimp decides reliability. A bad 8 AWG cable lug creates resistance. Resistance builds heat. Heat damages insulation or equipment. A good crimp joins wire strands and lug barrel solidly. Copper fuses under pressure. Air escapes completely. This process ensures long-term performance.
Why Crimps Matter for 8 AWG Wire
8 AWG supports 40 to 50 amps continuous in chassis wiring. Free air ratings reach 60 amps at 90 degrees Celsius. The lug junction faces vibration, heat cycles, and moisture. Poor crimps leave air gaps. Fault currents arc through them. Hot spots develop.
Hex crimping presses from six sides. It forms a gas-tight seal. Resistance drops below 0.1 milliohm. Connections stay cool. Tests confirm hex crimps withstand 200 percent more pull force than indent types.
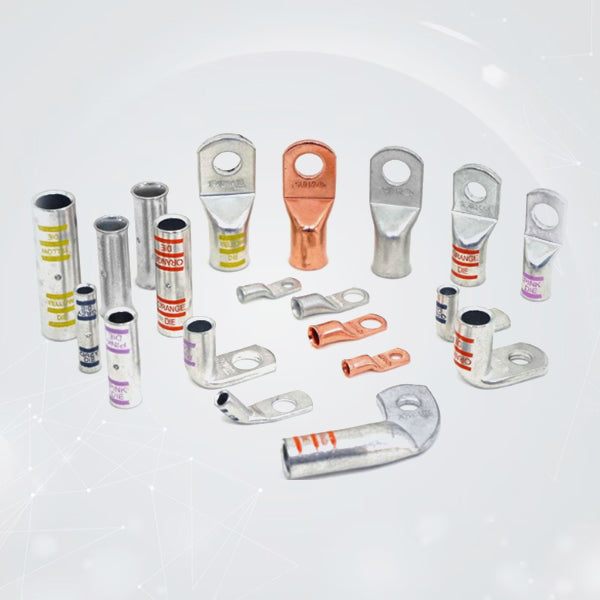
Selecting the Right 8 AWG Copper Lug
Choose seamless C11000 electrolytic copper for 8 AWG copper lugs. Barrel inner diameter measures 1/4 inch exactly. Tinned 8 gauge wire lugs prevent corrosion in engines or outdoors. Stud holes range from M6 to M10 for batteries and bus bars.
The Selterm 8 AWG collection offers these options. Avoid thin alloys that crack under compression. Inspection holes allow full insertion check.
Preparing the Wire Properly
Preparation sets up success. Use cable shears for square cuts. Diagonal cutters flare strands. Strip 1/2 inch of insulation. Match the 8 AWG notch to avoid nicks.
Fan strands lightly. Twist gently into a bundle. Flat strands pack best in the barrel. Dry-fit the wire into the 8 gauge battery lug. Strands bottom out. Bare copper extends 1/16 inch beyond insulation.
Sand oxidized strands with 600-grit paper. Clean surfaces improve conductivity. Isopropyl alcohol removes residues.
Choosing and Using Crimping Tools
Pliers deform 8 AWG cable lugs unevenly. Hammers leave voids. Needle-nose tools scratch without compressing.
Ratchet lever crimpers with hex dies work for garage use. They rotate for full coverage. Hydraulic hex crimpers deliver uniform pressure.
Indent dies crush two sides only. Ends remain loose on stranded wire. Hex profiles seal completely. Ratchets lock until full compression.
The Crimping Steps in Detail
Insert wire fully into the 8 AWG copper lug. Verify with inspection hole. Place barrel mouth-end in die. Center precisely.
Crimp first mid-barrel. This secures core strands. Rotate lug 180 degrees. Second crimp overlaps for uniformity. Barrel ends flare slightly, showing the "doughnut roll."
Check for hexagonal shape and smooth surface. No cracks or flat spots. Section a test piece. Strands fuse to walls. Shiny bond confirms quality. Pull strength exceeds 200 pounds.
Testing and Final Installation
Pull test with 100 pounds minimum. No movement passes.
Clean terminals before mounting. Add star washers. Torque 10 to 15 foot-pounds per specs. Overtightening reduces contact.
Apply 3:1 adhesive heat shrink. Slide on before crimping. Heat melts glue for waterproof seals. Strain relief protects against vibration. Required for vehicles, marine, or solar.
Bullet Points for Common Mistakes
- Twist strands too tight. Voids form from poor expansion. Fan loosely instead.
- Rely on soldering alone. Vibration snaps brittle joints. Crimp primary.
- Release ratchet early. Partial compression creates gaps. Full cycle required.
- Skip cleaning. Oxide raises resistance. Sand and wipe always.
- Use the wrong die. Indent leaves loose ends. Hex for 8 gauge battery lugs.
A solar inverter lost power from deformed crimps. Hex method and shrink restored full operation.
Advanced Crimping Methods
Multi-pass crimps add 50 percent strength. Core first. Outer layers second.
Add a second crimp near the inspection hole for vibration areas. Double-barrel fights fatigue.
Apply light flux before crimp in humid conditions. Aids weld without brittleness.
Digital torque gauges maintain accuracy. Inch-pound precision avoids distortion.
Cutaway views validate work. Voids mark failures. Fusion shows success.
Applications and Performance Data
Car audio uses 8 AWG copper lugs for 1000W RMS amps. Crimps survive bass surges.
Solar controllers at 40 amps need low resistance. Crimps maximize harvest.
Overland batteries feed 50 amps from alternators. Seals endure rough trails.
12V system, 40 amps, 15 feet: Good crimp loses 0.15V. Poor loses 0.4V. Output drops 3 percent.
Required Tools and Supplies
- Battery cable shears for square cuts.
- Precision stripper with 8 AWG notch.
- Hex ratchet crimper and 8 AWG dies.
- 600-grit sandpaper for cleaning.
- Isopropyl alcohol wipes.
- 3/8-inch 3:1 adhesive heat shrink.
- Digital torque wrench.
- 100 lb capacity pull scale.
Benefits of Quality Crimps
Ten minutes per end avoids repair downtime. Audio performs at peak. Solar output optimizes. Batteries charge efficiently.
Connections last longer than wire in most vehicles.
8 AWG Crimp Essentials
- Lug: C11000 copper, 1/4-inch barrel.
- Strip: 1/2 inch, clean and square.
- Crimp: Hex, multi-pass.
- Test: 100-pound pull.
- Seal: Adhesive shrink, torque specs.


