
How to Avoid Cable Damage When Installing 1 Gauge Wire Lugs
If you've worked with heavy-duty power cables, particularly ones used in RVs, solar battery banks, marine environments, or off-grid power systems, you know how important it is to create clean, solid connections. And with 1 AWG wire lug, it can get tricky.
One of the most common issues we see? Cable damage during lug installation.
Whether it’s due to the wrong tools, bad stripping method, or mismatch of components, getting this stage wrong can result in overheating, voltage drop, or premature cable failure - things you definitely do not want.
In this guide, we will show you how to properly install 1 AWG lugs without damaging your cable, losing conductivity, or compromising your setup.
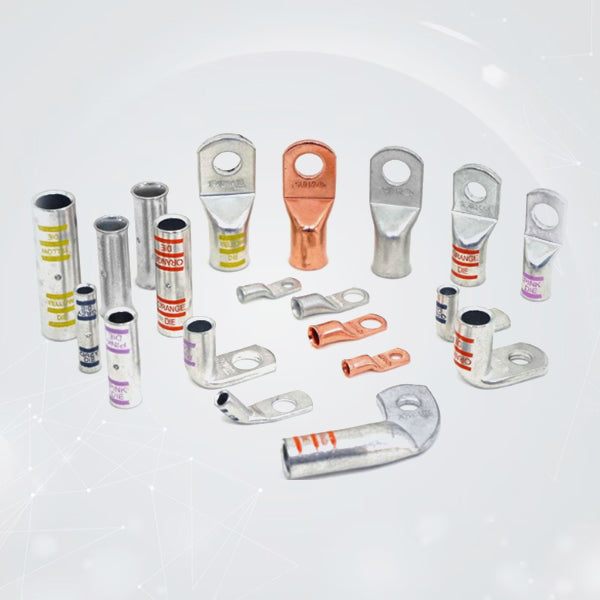
What Are 1 AWG Lugs?
A 1 AWG lug (also called a 1 AWG wire lug or 1 gauge wire lug) is a heavy-duty terminal made to connect 1 gauge wire, which is thick, powerful, and built for high-current applications, to a secure point like a battery post, busbar, or grounding block.
It’s a small part of your system, but it does a huge job: keeping current flowing safely and efficiently. If your lug is damaged, loose, or incorrectly crimped, the whole system can suffer or even fail.
That’s why proper installation matters so much.
Why Cable Damage Happens During Lug Installation
Here are the top reasons 1 gauge wire cables get damaged during lug installation and how you can avoid each one:
1. Using The Wrong Tool To Strip The Wire
This is probably the most common (and most frustrating) mistake. Some folks grab a utility knife or cheap stripper and end up nicking or cutting the copper strands inside the wire. That weakens the connection and increases resistance.
Fix: Always use a cable stripper that’s rated for 1 gauge wire lugs. Look for one with adjustable cutting depth so you can score the insulation without touching the copper.
2. Over-Crimping Or Under-Crimping
If your crimp is too light, the wire won’t hold. If it’s too tight, you can deform the barrel and crush the copper strands. Either way, you're risking poor conductivity and heat buildup.
Fix: Use a heavy-duty crimping tool rated for 1 AWG lugs. Hydraulic or hex-die crimpers are ideal. Make sure you're using the correct die size for 1 AWG, and apply even pressure.
3. Mismatched Lug And Cable Sizes
A lot of issues come from trying to force a lug that isn’t made for the cable you’re using. A loose fit leads to bad crimps, and a tight fit can damage the wire during insertion.
Fix: Use lugs specifically designed for 1 AWG cables. At Selterm, we machine each lug to precise specs so you get a clean, snug fit every time.
4. Skipping The Heat Shrink (And Regretting It Later)
You may think of it as just an "optional" final touch; however, heat shrink does add value. It protects the crimped joint from moisture, dirt, and vibration, and it reinforces the connection point so the cable doesn't flex or fray at the end of the connection
Fix: After crimping your 1 awg lug, you will slide the heat shrink tubing over the joint and use a heat gun or some other suitable heat source to shrink the heat shrink tubing down evenly. For outdoor or marine installs, use adhesive-lined shrink tubing for even better sealing.
Step-By-Step: Installing A 1 AWG Lug Without Cable Damag
Here’s how to do it right, no stress, no shortcuts:
1. Get the Right Tools
You’ll need a wire stripper rated for 1 AWG, a solid crimper (preferably hydraulic or hex), heat shrink tubing, and a heat gun. Trust us, don’t skimp on the crimper. Cheap tools can ruin your connection before you even start.
2. Strip Carefully
Strip about ½–¾ inch of insulation without cutting into the copper strands. Clean, even stripping is key for a strong connection. Take your time, and if you're new to this, practice first.
3. Match the Lug to the Wire
Make sure you’re using a lug specifically made for 1 AWG wire. Too loose or too tight, and you’ll risk cable damage. Selterm makes this easy by letting you filter lugs by wire and stud size.
4. Crimp It Right
Insert the wire fully into the lug and crimp it firmly with a proper tool. One solid crimp usually does the trick, two if it's a longer barrel. The lug shouldn’t move or wiggle afterward. Skip the hammer hack, go pro.
5. Seal It with Heat Shrink
Apply heat to a slide-on adhesive-lined heat shrink to seal the connection. This will provide protection against moisture, corrosion, and it looks neat. An added bonus is that its color-coded tubing makes it easy for troubleshooting later.
Bonus Tips to Keep Your Connections Clean and Safe
- Keep your tools sharp and calibrated — dull blades and misaligned dies ruin good wire.
- Label your cables if you’re doing a multi-lug setup — saves time and confusion later.
- Use UL-listed components (like Selterm lugs) for peace of mind and compliance.
- Inspect your lugs every few months, especially in high-vibration or outdoor installs.
Why Choose Selterm 1 AWG Lugs?
Selterm has been designing and manufacturing high-quality copper lugs. We understand the vital importance of ensuring clean, safe power connections, especially in mission-critical systems like back-up batteries, solar arrays, or marine equipment.
Our 1 AWG wire lugs are:
- Made from 99.9% pure copper
- UL & CUL certified
- Precision-machined for a perfect fit
- Chamfered for easy wire insertion
- Available in multiple stud sizes
- Built to last, even in harsh environments
Whether you’re a DIY builder or a professional installer, our lugs give you the confidence to wire it once and wire it right.
Final Thoughts
Working with heavy-gauge wire doesn’t have to be intimidating, as long as you have the right tools, the right lugs, and a little attention to detail. Damaging your cable during lug installation is 100% avoidable. And when you do it right, you’ll get a connection that lasts for years.
So slow down, take your time, and invest in components that are built to perform. Your system and your safety depend on it.
Ready to upgrade your setup? Explore our collection of 1 AWG wire lugs built for performance and reliability.


