

How to Choose the Correct Stud Hole Size for Your Car Audio Lugs
Upgrading a vehicle sound system to handle high-power amplifiers requires moving past small factory electrical lines. When installing massive subwoofers, secondary batteries, or high-output alternators, thick power cables are mandatory.
At this power level, the electrical network manages intense current.
A massive power cable requires a matching terminal connection to function safely. Squeezing a heavy terminal barrel with standard pliers or crushing it with a hammer fails. The connection point is the main failure zone. The circuit needs an absolute metal-on-metal bond that passes high current without creating a bottleneck.
That means learning how to choose the right hole size for your car audio lugs.
Matching the stud size incorrectly leads to immediate system trouble. A hole that is too loose limits the surface contact area, causing major resistance spikes, sudden voltage drops, and localized heat that can char wire insulation. When routing power through tight vehicular spaces, installing a precise car audio ground lug setup ensures the amplifiers draw clean, uninhibited current under full volume loads.
The Reality of Retail Terminal Hardware
Look at the flashy, gold-plated connectors sitting in discount retail bins. Most of those generic options are cast from brittle zinc alloys or thin brass blends with nothing but a cosmetic coating on the outside.
They snap under structural pressure.
The moment significant torque hits the mounting nut, those cheap retail options split open down the barrel seam or warp across the flat face. Even if they bolt down without cracking immediately, their actual electrical conductivity is poor compared to pure, seamless copper.
Engine bays, vehicle frame rails, and trunks are brutal on power hardware. Road vibrations mix with heavy bass notes that rattle the entire chassis. Mismatched or thin retail terminals loosen under this constant physical shaking. The mechanical contact point degrades, internal resistance shoots up, and the resulting voltage drops starves the amplifier, causing audio clipping and thermal shutdown.
Why Pure Copper Needs a Tin Coating
Long-term audio performance depends on the structural metal. Clean power distribution requires terminations built from seamless C11000 electrolytic copper. This grade provides the highest possible electrical and thermal performance. Because pure copper is soft and workable, it deforms uniformly under hydraulic tool pressure.
A seamless barrel flows perfectly around the flexible wire strands instead of splitting down a weak seam. This action fuses the wire and the connector into one solid block with zero internal air pockets.
However, bare copper oxidizes quickly when exposed to under-hood heat, road salt, or battery fumes. This creates a dull green crust that destroys electrical conductivity.
An electroplated tin layer solves this issue completely. Tin naturally resists the corrosive effects of moisture, grease, and battery acids. A micro-thin layer of tin completely wraps the raw copper core to form an airtight barrier. This plating keeps the underlying copper isolated so your car audio battery lugs maintain their raw current-carrying capacity for years.
Measuring for the Correct Stud Hole Size
Choosing the right pad hole diameter prevents loose connections and maximizes current transfer. Vehicle alternators, battery terminals, and chassis grounding points use various bolt dimensions. Guessing the size usually results in a sloppy fit or a terminal that won't slide over the stud.
|
Bolt/Stud Size |
Fractional Diameter |
Decimal Diameter (Inches) |
Metric Equivalent |
|
#10 Stud |
~3/16" |
0.190" |
4.8 mm |
|
1/4" Stud |
1/4" |
0.250" |
6.4 mm |
|
5/16" Stud |
5/16" |
0.312" |
7.9 mm |
|
3/8" Stud |
3/8" |
0.375" |
9.5 mm |
|
1/2" Stud |
1/2" |
0.500" |
12.7 mm |
To find the perfect fit, use a set of digital calipers or a standard bolt gauge on the mounting stud. A matching car audio wire lugs setup should slide over the bolt thread easily without excessive side-to-side play. If the hole is too large, the mounting washer will bow into the gap, reducing contact area and creating an immediate electrical bottleneck.
Step-by-Step: 2 AWG Crimp Process
1. Strip the Insulation Back to Fresh, Clean Metal
Never crimp a terminal over dark, oxidized, or dirty wire strands. If the cable is older or has been sitting in a damp shop, cut the bad sections back until actual bright copper shows up. If the strands still look dull, grab a stainless steel wire brush and scrub them hard. The metal needs to look completely clean before it ever goes inside the barrel.
2. Verify Seating Depth
Strip the wire insulation jacket back to match the exact length of the lug barrel. Push the wire fully into the terminal until the copper strands show through the inspection window. The insulation jacket must sit flush against the back of the barrel entry with a gap under 1/16 of an inch.
3. Deploy the Correct Hex Crimp Tooling
Match the wire gauge size exactly to the right barrel die on the crimping tool. Do not guess or use a random size. Use a quality manual or hydraulic hex tool to crush the barrel completely. Let the tool finish its full mechanical cycle, fusing the strands and the terminal walls into one seamless chunk of copper.
4. Seal Up the Whole Joint with Adhesive Heat Shrink
Slide a piece of heavy-wall, adhesive-lined 3:1 heat shrink tubing directly over the raw metal connection. Use a heat gun on it. Watch for the internal glue to melt and squirt out around the bottom edges of the tubing. That squeezed-out glue is exactly what you want—it creates a permanent, waterproof seal that blocks road salt, pooling rainwater, engine grease, and battery fumes from rotting the copper strands over time.
Real-World Vehicle Maintenance Protocols
Preventative electrical care prevents sudden charging system failure. Every major power connection point beneath the hood needs a physical inspection at least once a season. Do not just look at it from a distance. Get in there and check for any lifting around the heat shrink edges or dull graying on the metal surfaces.
Slapping a thin layer of specialized dielectric paste or anti-corrosion spray over the bolted connection creates a great secondary boundary against the air.
If a terminal has to come off for an equipment upgrade, clean the pad faces down to the bright tin layer with a clean rag and some isopropyl alcohol.
- Ditch the sandpaper. Do not touch a tinned terminal pad with a coarse metal file or heavy emery cloth. Scraping the surface destroys that thin protective tin layer instantly. Once the raw copper underneath is exposed, moisture hits it, and rot takes over the whole connection.
- Scrap the worn hardware. If the tin coating looks visibly gouged, flaked off, or shows raw red copper bleeding through the surface, throw it away. Reusing a compromised terminal is a bad idea. Cut the cable back to clean strands and crimp on a fresh piece of hardware instead.
Industrial Hardware Options
An electrical setup fails the moment its weakest connection point gives out. Skimping on basic wire ends leads to sudden power drops under heavy loads, fried components, and hours of brutal diagnostic work down the road.
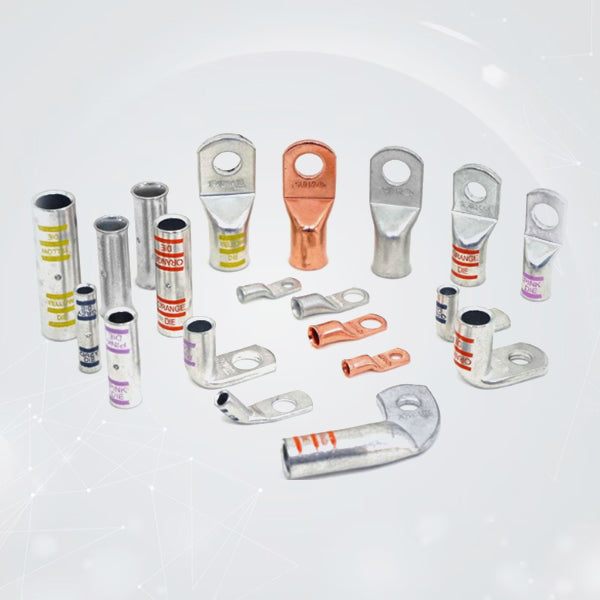
If you want hardware built to survive extreme engine temperatures and constant chassis vibrations, the options found in the Selterm Car Audio Collection are built for those exact conditions. These are manufactured from seamless copper tubes with thick, precision-machined flat pads. They take maximum crushing forces from a hydraulic tool without splitting open or cracking down the side.
Upgrading the main power connections with premium hardware eliminates the risk of resistance build-up, sudden voltage drops, and structural metal failures. Integrating high-purity copper metallurgy with a premium finish, professional hexagonal tooling, and a proper adhesive-lined heat shrink seal provides a cool-running, highly efficient power network that runs safely for decades.