

How to Properly Crimp 2 AWG Cable Lugs for a Secure Connection
Step up an electrical system to run things like a commercial winch, an emergency power inverter, or an off-grid solar bank, and the job requires thick wire. Specifically, 2 AWG.
At this thickness, the job no longer involves simple accessory wiring. This gauge handles massive electrical loads that require absolute continuous power delivery.
But a heavy cable is only as good as the joint connecting it to the equipment. Mashing a 2-gauge wire with a pair of pliers and calling it a day will not work. The connection point is the number one failure zone. The setup requires an airtight, metal-to-metal bridge that moves massive current without dropping voltage.
That means knowing the exact steps to crush a 2 gauge terminal lug.
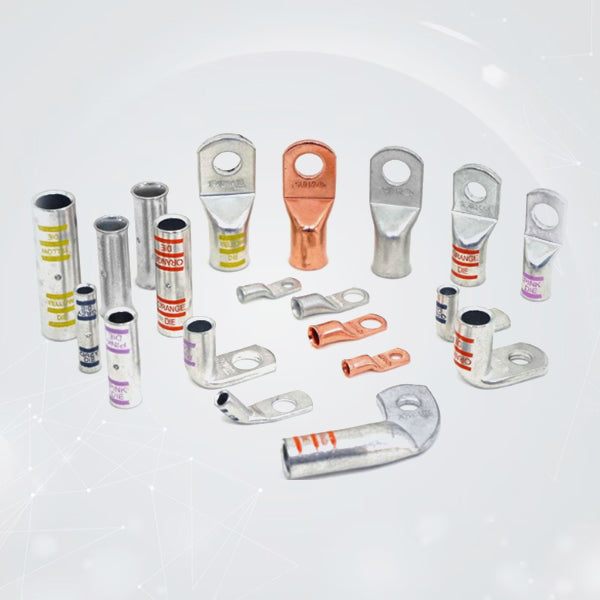
Get this mechanical junction wrong, and things turn bad fast. Electrical resistance spikes, voltage drops, and the connection itself will get hot enough to char the wire jacket. When routing high-current lines, running a premium 2 gauge battery lugs setup is the only thing keeping circuits running cool and safe under full operational loads.
Why Cheap Parts Counter Connectors Fail the Test
Walk into a retail auto parts store and look at the bulk bins. Plenty of cheap battery ends look shiny on the shelf.
Do not buy them. They are garbage.
Most of those unbranded parts are cast from brittle zinc alloys or cheap recycled brass with a paper-thin copper flash plating on the outside. The second thousands of pounds of pressure hit the barrel seam with a professional field tool, those cheap alternatives split wide open or crack right along the flat mounting pad. Even if the part bolts down without breaking, the actual electrical conductivity is terrible compared to pure copper.
The engine bay or frame rail of a work truck is a brutal environment. Temperatures swing from freezing winter nights to over 200 degrees Fahrenheit when the engine works under a load. This constant thermal cycling forces mismatched metals to expand and contract at completely different rates.
Thin-walled retail terminals warp under this constant stress. The mechanical grip on the wire relaxes, internal resistance shoots up, and the whole joint starts to generate localized heat that ruins expensive wiring harnesses.
The Metallurgy Behind a Gas-Tight Connection
To make a 2-gauge installation last for years without requiring constant troubleshooting, look at the metal core. Industrial systems rely exclusively on terminations built from seamless C11000 electrolytic copper.
This pure grade of copper provides maximum electrical and thermal performance. Because pure copper is naturally soft and workable, it deforms uniformly when compressed by a hydraulic tool.
Instead of cracking along a weak seam, the heavy copper barrel flows directly around the individual wire strands. This action fuses the wire and the connector into one dense, solid block of copper with zero internal air pockets where moisture or corrosive vapors can hide.
Selecting the right finish for 2 awg wire lugs depends entirely on where the lines run:
- Bare Copper Finish: This gives the lowest possible contact resistance right out of the box. It works beautifully for dry truck interiors, trunk-mounted battery relocations, or sealed indoor electrical enclosures behind the dash. A quick dab of conductive paste helps bare copper handle normal interior humidity with zero issues.
- Tin-Plated Finish: If the 2-gauge lines run under a vehicle chassis, near open wheel wells, or inside damp marine bilges, the job requires tinned copper. A micro-thin layer of tin completely coats the raw copper core, shielding the underlying metal from aggressive chemical corrosion, green rot, and road salt slime. This protective plating keeps electrical resistance low for years.
Solder vs. Mechanical Crimping
An old-school garage trick that still ruins tons of wiring systems is using a propane torch to solder heavy electrical lines. Solder looks clean and shiny when it first melts into place, but it is a terrible choice for anything that moves or vibrates.
As the terminal barrel heats up, capillary action sucks that liquid solder right up past the metal barrel and deep into the flexible stranded wire. Once that solder cools down, it transforms the flexible cable into a rigid, brittle metal rod.
Engines shake constantly, and roads are full of potholes. All that shaking and mechanical stress targets the exact spot where the flexible rubber wire jacket meets that rock-hard soldered section. Over time, the copper wire strands fatigue and snap clean off right at the back of the lug barrel.
The universally accepted standard for industrial compliance is a gas-tight mechanical crimp. Squeezing the lug barrel from six sides simultaneously with a hex crimper cold-welds the wire strands directly to the inner lug walls, forcing out all air so internal oxidation cannot start.
Step-by-Step: Executing a Flawless 2 AWG Crimp
1. Strip the Cable Down to Fresh, Bright Metal
Do not crimp a clean connector over dirty, dark, or oxidized wire strands. If working on an old truck or an existing solar setup, cut the bad, green sections of cable back until fresh, bright copper appears. If the wire strands look dull, grab a stainless steel wire brush and scrub them hard. The metal must shine like new money before it ever touches the inside of the barrel.
2. Strip and Verify Seating Depth
Strip the wire insulation jacket back to match the exact length of the lug barrel. Push the wire fully into the terminal until the copper strands show through the inspection window. The insulation jacket must sit flush against the back of the barrel entry with a gap under 1/16 of an inch.
3. Deploy the Correct Hex Crimp Tooling
Match the wire gauge size exactly to the right barrel die on the crimping tool. Do not guess or use a random size. Use a quality manual or hydraulic hex tool to crush the barrel completely. Let the tool finish its full mechanical cycle, fusing the strands and the terminal walls into one seamless chunk of copper.
4. Apply Adhesive Heat Shrink to Lock Out the Weather
Slide a piece of heavy-wall, adhesive-lined 3:1 heat shrink tubing directly over the raw metal joint. Take a heat gun to it. Watch for the internal glue to melt and squirt out around the edges of the tubing. That melted glue forms a permanent, waterproof seal that blocks road salt, pooling rainwater, engine grease, and battery fumes from rotting the copper strands.
Shop Hardware Built for Service
The electrical power system is only as reliable as its weakest connection point. Cutting corners on small termination components always costs more later in troubleshooting, dead components, or roadside failures.
The heavy-duty options available in the Selterm 2 AWG Collection are engineered specifically to handle the extreme temperatures and high vibrations found under heavy vehicle hoods. Manufactured from seamless copper tubes with heavy, precision-machined flat pads, these components accept maximum crimping loads without splitting or cracking apart.
Upgrading the wiring connections with premium 2 awg cable lugs eliminates the risk of resistance build-up, erratic voltage drops, and structural metal failures. Combining high-purity C11000 copper metallurgy with professional hexagonal tooling and a proper adhesive-lined heat shrink seal provides a cool-running, highly efficient power network that runs safely for decades.