How To Use Heat-Shrink With 6 AWG Tinned Lugs To Prevent Corrosion
In any electrical setup, whether using solar panels, marine systems, or portable power units, reliable connections are essential. The quality of your electrical lugs and the way they are made is crucial to determine if your electrical setup falls apart later due to weak connections or loads you aren't prepared for. In this case, with 6 AWG tinned lugs, you are safely operating in the mid-range power demands using wire designed to take some tougher environments.
But even the best 6 gauge tinned lugs, also known as 6 AWG tinned lugs, need a little extra protection. This is where heat-shrink tubing comes in. Pairing the right heat-shrink with your 6 AWG tinned lug can dramatically reduce the risk of corrosion, extend the life of your cables, and keep your system performing at its best.
Why Corrosion Is A Problem You Can’t Ignore
Corrosion isn’t just about looks; it affects how electricity flows. Moisture, salt, or dirt can affect the bare or tinned copper, causing it to oxidize, which will limit the flow of power and eventually, overheating and failure will occur.
For applications like:
- Marine systems exposed to salt spray,
- Solar setups out in all-weather conditions, and
- RVs or off-grid power stations that face constant vibration and dust,
Protecting your lugs against corrosion is essential. That’s why pairing 6 AWG tinned lugs with heat-shrink isn’t just a “nice-to-have”, it’s a best practice.
Step 1: Start With Quality Lugs
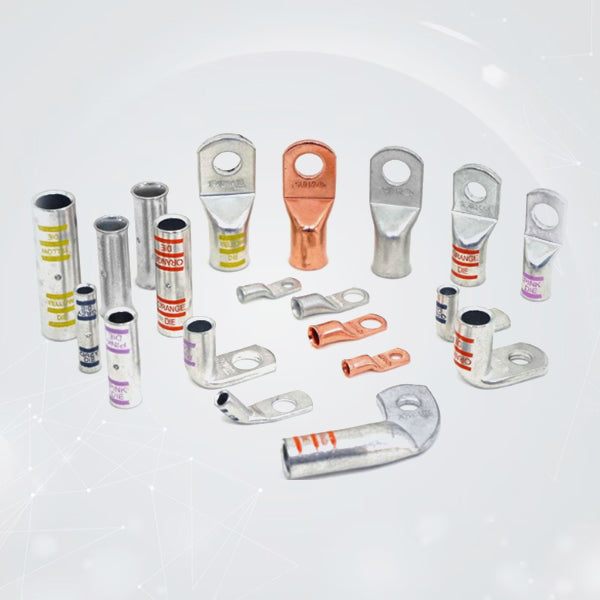
All lugs are not the same. A 6 AWG tinned lug is constructed for both conductivity and corrosion resistance. The tin coating on the lug protects the underlying copper from rapid oxidation, so tinned lugs can handle a harsh or outdoor environment much better than bare copper.
By using UL-listed like 6 AWG tinned lugs from a reputable company such as Selterm, you’re starting with components that are engineered for durability and safety.
Step 2: Prepare The Cable Correctly
Before fitting your lug or tubing, there are a few things to take care of.
- Cut Cleanly: We don't want frayed ends, so use a sharp cutter for cable.
- Strip Precisely: Remove just enough insulation for the conductor to seat fully into the lug barrel.
- Check the Conductor: Be aware of oxidation or damage because corroded copper will not crimp satisfactorily.
A clean, snug fit between the conductor and tinned lug under 6 gauge is a recipe for strong connections that will last.
Step 3: Crimp For Strength And Conductivity
The lug must be crimped with the right tool, no shortcuts. A proper heavy-duty crimping tool matched to the lug size ensures:
- Maximum surface contact between strands and barrel.
- A gas-tight seal that helps keep moisture out.
- Mechanical strength that resists vibration.
Poor crimps leave tiny gaps where moisture creeps in, leading to corrosion from the inside out.
Step 4: Apply Heat-Shrink Tubing
Now comes the key step, sealing the connection with heat-shrink. Here’s how to do it right:
- Slide Tubing On First: Before crimping, place the tubing over the cable. (It’s the step too many forget.)
- Choose the Right Size: For 6 AWG wire, tubing with about 20–30% larger diameter pre-shrink is ideal.
- Select Adhesive-Lined Tubing: This melts and flows when heated, creating a watertight seal.
- Use a Heat Gun, Not a Flame: Move evenly around the tubing until it contracts snugly.
The result is a sealed connection where the 6 AWG tinned lug is fully protected from exposure to moisture, dirt, and salt.
Step 5: Inspect And Protect Further
After shrinking, check for:
- Smooth, uniform coverage.
- Adhesive oozing slightly at the ends (a good sign of sealing).
- No burn marks or bubbles.
For marine or heavily exposed systems, adding dielectric grease before shrinking or using a protective boot afterward can provide an extra layer of defense.
Common Mistakes To Avoid
Even experienced installers sometimes cut corners. Here are a few pitfalls to watch out for:
- Using bare copper as opposed to tinned lugs: Copper actually corrodes much faster in damp & salty environments.
- Overheating the tubing: Overheating the tubing will compromise the insulation and maybe even the seal itself.
- Using non-adhesive tubing: Plain tubing just isn't enough in harsh environments.
- Not using a strain relief: Unsupported cables will put stress on the lug joint, even if there is heat-shrink.
If you avoid these mistakes, your 6 gauge tinned lug will last as long as your system.
Real-World Applications
Here’s where you’ll see the benefits of this practice most clearly:
- Marine boats: Saltwater is constant, so corrosion protection is essential.
- Solar arrays: Outdoor panels have to contend with rain, UV, and extreme variance in temperature.
- Portable power stations: Heat-shrink is helpful for UV durability and resistance to dust and vibration.
- Car audio or RV systems: Protects against oxidation while providing stable power.
In all cases, the same idea applies: quality lugs with quality heat-shrink = reliability for the long term.
Final Thoughts
Corrosion can be one of the biggest dangers to electrical systems, but it's also one of the easiest threats to defend against. By combining a 6 AWG tinned lug with heat-shrink tubing which is applied correctly, you create a durable, sealed connection against moisture, vibration and the environment.
This one simple added step will help you gain peace of mind and enjoy reduced maintenance and improved performance.
If you’re working on marine, solar, or portable power systems and need dependable components, check out Selterm’s 6 gauge tinned lugs. Combine them with high-quality heat-shrink for connections that are built to last.


