
Step-by-Step: Crimping Tinned Copper Lugs for a Reliable Connection
A strong electrical connection goes beyond just using the right wire it’s about choosing the right lug and crimping it correctly. Tinned copper lugs are a top choice for a reason. With the excellent conductivity of pure copper and the added protection of a tin coating, tinned copper lugs are built for tough applications like automotive, marine, solar, and industrial use. But remember, even the best lug won’t deliver reliable results without proper crimping.
In this guide, we’ll walk you through everything you need to know from why tinned copper wire lugs are preferred, to how to crimp them step by step, so your connections stay strong and dependable for years.
Why Tinned Copper Lugs Are a Smart Choice
Before getting into the crimping process, it helps to know why tinned copper cable lugs are considered the gold standard for many wiring projects.
Here’s what tinned copper wire lugs offer:
High Conductivity
Since the base material is pure copper, the tinned copper lug maintains excellent electrical performance with minimal resistance.
Corrosion Protection
Tin coating stops moisture, salt, and oxidation from getting to the copper. Because of that, tinned copper wire lugs hold up great in marine, RV, and other outdoor systems.
Stronger, Cleaner Crimps
Tin plating helps the lug hold its shape during crimping and reduces the chance of cracking. It also pairs well with heat shrink for a clean, sealed finish.
Reliable Long-Term Performance
Whether it’s a solar array or a battery bank, these tinned copper cable lugs stay reliable even under vibration, changing temperatures, and continuous current.
Tools You Need Before Crimping
To get a clean and secure termination, make sure you have:
- The correct tinned copper cable lug for your wire gauge
- A compatible crimping tool (hydraulic, hex, or mechanical)
- Wire cutters
- Wire stripper
- Adhesive-lined heat shrink tubing
- Heat gun
Choosing the right lug and the right tool is half the work. Tinned copper lugs come in multiple stud sizes and barrel types, so match your lug to both the wire size and the hardware you’re mounting to.
Step 1: Select the Correct Tinned Copper Lug
This step is more important than many realize. A perfect crimp starts with the correct match.
Check these three things:
- Wire gauge – Make sure your lug matches the conductor size exactly.
- Stud size – Choose the hole size based on the terminal or post you're mounting to.
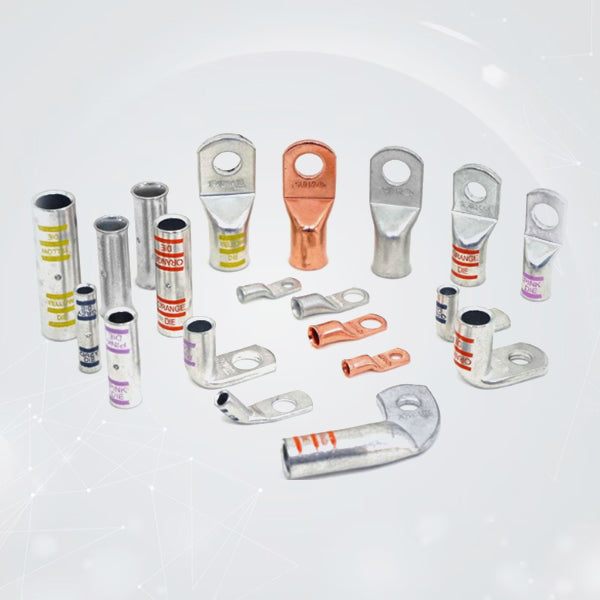
- Barrel type – Heavy-duty flared barrels are easier to insert and crimp.
Using the wrong lug size can cause loose crimps, high resistance, and overheating but all of that can be avoided by choosing the right size from the start.
Step 2: Strip the Wire Cleanly
Take off just enough insulation about ½ to ⅝ inch - to fit the lug, and avoid twisting or over-bending the wire strands.
A clean strip ensures:
- Full contact inside the barrel
- Even compression during crimping
- No stray strands sticking out of the barrel
Check that the bare copper fits neatly into the lug without pushing into the inspection window.
Step 3: Insert the Wire into the Lug
Slide the exposed wire into the barrel until it stops. The strands should be flush with the end of the lug’s barrel but not sticking out.
Good wire seating improves:
- Electrical contact area
- Mechanical strength
- Heat distribution under load
If your lug has an inspection hole, use it to make sure the wire is fully inserted.
Step 4: Set Up Your Crimping Tool
Your tool should be compatible with the lug and wire gauge. Most heavy-duty tinned copper cable lugs work best with:
- Hex dies
- Hydraulic crimpers
- Hammer crimp tools
Pick the die size that matches your wire gauge, using the wrong one is one of the easiest mistakes to make when crimping.
Step 5: Crimp the Lug
Place the barrel into the die, making sure it sits evenly. Apply firm, steady pressure until the barrel compresses fully.
A good crimp should have:
- A solid, symmetrical compression mark
- No cracks or splits in the barrel
- Tight bonding between copper strands and the lug
- No movement when you tug the wire gently
If you’re using a hex or hydraulic tool, one strong crimp is usually enough. Hammer tools often require two aligned crimps.
Step 6: Inspect the Crimp
Before sealing the connection, take a moment to check:
- The wire doesn’t pull out
- The crimp feels solid
- There’s no exposed copper outside the barrel
- The barrel hasn't deformed unevenly
This part is quick but crucial. A failed inspection now can save you from troubleshooting power issues later.
Step 7: Add Heat Shrink for Protection
Slide an adhesive-lined heat shrink tube over the crimp and apply heat with a heat gun. As it shrinks, it seals the connection from:
- Moisture
- Corrosion
- Chemical exposure
- Vibration
This step is especially important in marine and automotive wiring where reliability is key.
Common Mistakes to Avoid When Crimping Tinned Copper Lugs
Even experienced installers make mistakes sometimes. Here are the most common ones to watch out for:
- Using the wrong lug size
- Stripping too much or too little insulation
- Applying a partial or uneven crimp
- Using non-compatible dies
- Skipping heat shrink
- Crimping onto damaged or oxidized wire
Avoiding these mistakes ensures that your connection stays strong for years.
Why Proper Crimping Matters in Heavy-Duty Applications
A poorly crimped lug increases resistance, which creates heat. That heat can damage insulation, reduce performance, and even lead to failure.
A correctly crimped tinned copper lug:
- Maintains low resistance
- Transfers current efficiently
- Reduces voltage drop
- Handles vibration and temperature shifts
- Provides long-lasting reliability
In demanding systems like RVs, solar banks, inverter wiring, and marine equipment, these details make a real difference.
Build Connections That Last
It’s not complicated to crimp tinned copper lugs properly - you just need to be precise. When everything is matched correctly, from the lug to the tool to the technique, you get a strong, low-resistance connection that holds up and resists corrosion for years.
For heavy-duty tinned copper lugs designed for strong crimps and long-lasting stability, explore Selterm’s collection of tinned copper wire lugs. Each lug is designed to meet industry standards while giving you the durability and performance your wiring projects need.


