
Step-By-Step Guide To Crimping Bare Copper Lugs The Right Way
When you’re setting up an electrical system, be it for a battery, RV, or solar project, getting those connections right makes all the difference. Bare copper lugs are a favorite because they offer strong, low-resistance connections that can carry heavy current without overheating or corroding.
But here's the thing: if your crimping isn't spot-on, it can cause all sorts of issues like voltage drops or even system failure. The good news is, crimping copper battery lugs the right way isn’t hard once you know the steps.
In this guide, we'll walk you through everything you need to make strong, reliable connections that work every time.
Understanding Bare Copper Lugs
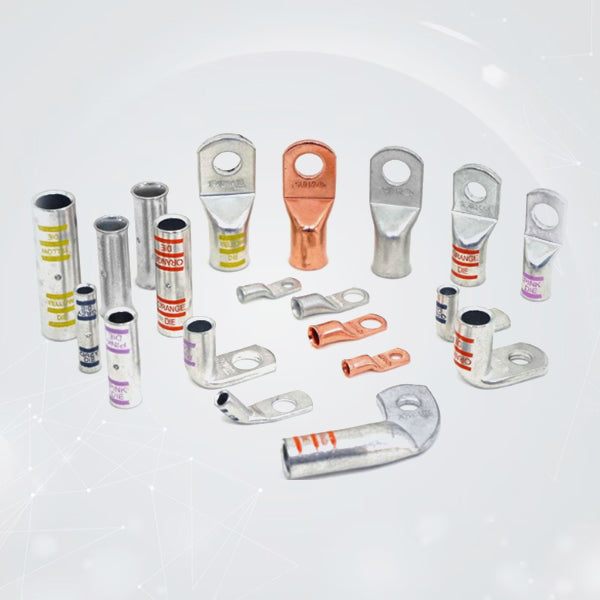
Bare copper lugs, sometimes known as battery copper lugs or copper battery lugs, are connectors made entirely of pure copper without any coating. They’re widely used in automotive, marine, solar, and industrial setups because copper offers excellent conductivity and mechanical strength.
Bare copper lugs don’t have the protective layer you’d see on tinned ones, which actually makes them great for indoor use or any setup where moisture isn’t a big concern. Since they offer the best conductivity, they’re often used as heavy duty battery lugs in high-power systems like inverters, battery banks, and heavy machinery.
Tools You’ll Need Before You Start
Before you start, confirm that all required tools exist in your work area.
- Crimping tool (hydraulic or heavy duty hand crimper),
- Wire stripper,
- Heat shrink tubing (optional for insulation),
- Cable cutter,
- Multimeter (to test continuity after crimping)
The correct tools enable secure crimping of copper battery lugs while protecting the wire strands from damage.
Step-By-Step Crimping Process
Step 1: Measure and Strip the Wire
A clean straight cut should be used to create the specific desired length in your cable. You should remove about half an inch of protective material from the cable's end. It is essential to avoid any damage to the copper wire since this action would create a weak connection point.
Step 2: Choose the Right Lug Size
Select a lug that matches both the wire thickness and the stud dimensions for proper connection. A 2 AWG cable requires a 2 AWG lug according to the standard. An incorrect size selection may result in either a loose connection or reduced electrical conductivity.
Step 3: Insert the Wire into the Lug
Insert the stripped wire end into the lug barrel until the copper strands reach the maximum depth. The wire should create a complete connection with the lug barrel without any visible empty spaces.
Step 4: Crimp Securely
Insert the battery copper lug inside your crimping tool before pressing it with a solid, but equal force. The proper crimping of heavy duty battery lugs needs complete barrel compression without causing any deformation.
A hydraulic crimper typically requires two or more crimps to be performed, depending on the length of the battery copper lugs.
Step 5: Inspect and Seal the Connection
The crimp should display a consistent appearance, while the wire strands must stay firmly compacted. The cable needs to be pulled gently for testing purposes to guarantee it stays in place.
The crimped section requires protection through adhesive heat shrink tubing when used in outdoor environments or applications with high vibration, to stop moisture from entering and corrosion from developing.
Common Crimping Mistakes To Avoid
It doesn’t matter how experienced you are, crimping mistakes happen. The key is knowing what to look out for:
- Using the wrong tool: Don’t reach for regular pliers. They just won’t give you a solid crimp.
- Over-crimping: Too much pressure can flatten the copper battery lug and hurt the connection.
- Under-crimping: Not enough pressure leaves it loose, which leads to heat and voltage drop.
- Skipping insulation: Without heat shrink, bare copper will start to oxidize pretty quickly.
Take a quick look over your work before calling it done—it’s the easiest way to avoid future headaches.
Why Bare Copper Lugs Are Ideal for Heavy Duty Use
Copper is the best choice for electrical connections because it’s super good at carrying current and strong enough to handle heavy loads. Using heavy duty battery lugs made from pure copper keeps voltage drops low, even when your system is running a lot of power.
They’re especially useful in applications like:
- Automotive battery systems
- Inverter setups
- Solar power connections
- Industrial machinery
Because bare copper conducts electricity more efficiently than tinned versions, it’s perfect for environments where corrosion isn’t a major concern.
Maintenance Tips For Long-Lasting Connections
Keeping your connections in top shape doesn’t have to be complicated. Here’s what I do:
- Check them often: Look for any signs of corrosion or discoloration creeping in.
- Snug them up: Movement and vibration can loosen connections, so tighten lugs if they feel loose.
- Clean before reconnecting: A quick brush or contact cleaner removes any buildup and keeps things working well.
- Swap worn cables: Damaged or frayed wires? Replace them immediately.
A little regular care like this goes a long way in keeping your system safe and trouble-free.
Key Takeaways For Using Bare Copper Lugs In High-Current Setups
Every solid electrical system starts with a well-crimped connection. Using bare copper lugs and crimping them correctly ensures your links can handle heavy currents without overheating, keeping everything efficient and safe.
For high-quality, UL-listed battery copper lugs built for performance and durability, explore Selterm’s collection of battery copper lugs today and get dependable components that make every connection count.


