
The 6 AWG Lug Installation Guide: Tools, Techniques, and Safety Tips
Let’s say you’re working on your RV, setting up a solar battery system, or just trying to get a bit more juice out of your golf cart; you’ll eventually need to connect thick battery cables. That’s where 6 AWG lugs come in.
They are not glamorous; they are just important: they help your power get to your car at a safe and consistent level. Whether you are wiring for performance or just reliability, connectors (like 6-gauge wire lugs) are far more important than people give them credit.
In this blog, I'll show you how to properly install the lugs with the right tools, some mistakes to watch for, and other basic safety things you absolutely don't want to skip. It is easy, and I will keep things simple and straightforward, nothing technical or complicated process steps.
What Are 6 AWG Lugs, And Why Do They Matter?
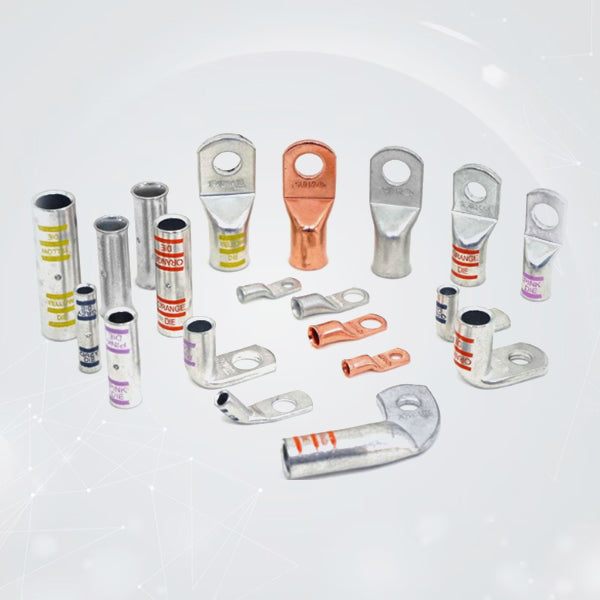
A 6 AWG lug is a heavy-duty connector made to fit 6 gauge copper battery lugs wire. It’s what you use when you need to hook that wire up to something solid, like a battery post, busbar, switch, or ground point, and you want the connection to actually last.
You can't just wrap the thick cable around the bolt and consider it done. This isn't a secure connection, and it isn't safe. This is where the lug comes in. You crimp onto the end of your wire, bolt it in place, and now you have a clean, secure, low-resistance connection.
At Selterm, we’ve been making these things for decades, and here’s what we’ve seen: people get into trouble when they use cheap lugs, skip the crimping step, or mismatch sizes. That’s when wires heat up, voltage drops, or worse, stuff starts melting. A proper lug, installed right, prevents all that.
So yeah, it’s just a piece of copper. But in any setup where current matters, RVs, solar, marine, custom builds, it’s the kind of detail that makes the whole system work better, longer, and safer.
Tools You’ll Need Before You Start
Good news: installing a lug isn’t complicated. But having the right tools can make all the difference.
Here’s a basic checklist:
- Cable cutters – to trim the wire cleanly
- Wire stripper – to remove insulation without damaging copper strands
- Crimping tool – preferably a hex or dieless crimper rated for 6 AWG lugs
- Heat gun (optional) – if you’re adding heat shrink tubing for protection
- Heat shrink tubing – especially important for marine or outdoor installs
Don’t try to crimp with a pair of pliers or a hammer. Use a proper crimping tool; it’s safer and gives you a much more reliable connection.
Step-By-Step: Installing A 6 AWG Copper Lug
1. Measure & Cut Your Cable
Trim your cable to the right length using a sharp cutter. A clean cut makes the rest of the job much easier.
2. Strip the Insulation
Use a wire stripper to remove about ¾" of insulation from the end of the cable. Be careful not to cut into the copper strands, which can weaken the connection.
3. Insert the Wire into the Lug
Slide the bare copper wire all the way into the lug barrel until it stops. If any copper is sticking out, trim and reinsert.
4. Crimp It Down
Position the lug in your crimper using the correct die for 6 AWG. Apply steady pressure. Some setups may call for a second crimp slightly up the barrel. When done right, the wire shouldn’t wiggle or pull loose.
5. Seal It with Heat Shrink (Optional)
If your install is exposed to the elements, like in boats, RVs, or engine bays, sealing the joint with heat shrink tubing adds protection and longevity. Use a heat gun to shrink it evenly.
Safety First: Simple Tips To Keep In Mind
- Always disconnect the power before working on any wiring.
- Check your polarity, positive to positive, negative to negative.
- Don’t skip the crimp; a loose connection can heat up fast.
- Use UL-listed lugs and tools when possible for added peace of mind.
- If you're unsure about a connection, use a multimeter to test continuity
What Makes Selterm’s 6 AWG Lugs Stand Out?
Not all lugs are created equal. At Selterm, we manufacture our lugs with precision and durability in mind. Here’s what you get when you choose Selterm:
- Pure, high-conductivity electrolytic copper
- UL & CUL certified for safety
- Chamfered entry for easy wire insertion
- Available in multiple stud sizes
- Compatible with a wide range of crimping tools
We’ve spent decades refining what makes a lug great, and whether you’re looking for 6 gauge wire lugs for your solar array or rugged 6 AWG wire lugs for your boat or golf cart, we’ve got you covered.
Real-World Use Cases
Here's where we see these lugs making a difference:
- Golf cart owners looking to reduce resistance and boost performance
- RV travelers upgrading to lithium battery systems.
- Solar enthusiasts wiring inverters or battery banks.
- Boaters replacing corroded terminals for better reliability.
- DIYers building custom portable power stations
Final Thoughts
Working with battery cables and heavy-gauge wire doesn’t have to be intimidating. Whether you're rewiring a solar array or just trying to get more power to your subwoofers, having the right 6 gauge wire lugs and installing them correctly can save you headaches down the road.
Selterm’s 6 gauge copper battery lugs are built for reliability, safety, and real-world use. From backyard projects to marine installs, they’re a small part that makes a big difference.


