
Tinned Copper Lug Maintenance: Cleaning and Inspection Tips for Longevity
If you’re using tinned copper lugs in your RV, boat, solar setup, or backup battery bank, you’re already ahead of the game. This lug is engineered for harsh conditions such as moisture, salts, vibration, and continuous use and won't corrode like standard copper or aluminum.
However, even the best equipment needs care and maintenance from time to time.
In this guide, we’ll show you exactly how to inspect and maintain your tinned copper cable lugs so they keep doing their job safely and efficiently, for the long haul. No guesswork, no jargon. Just practical advice that works whether you’re wiring up a cabin in the woods or keeping your marine system running smoothly.
Why Tinned Copper Lugs Last Longer (But Still Need Care)
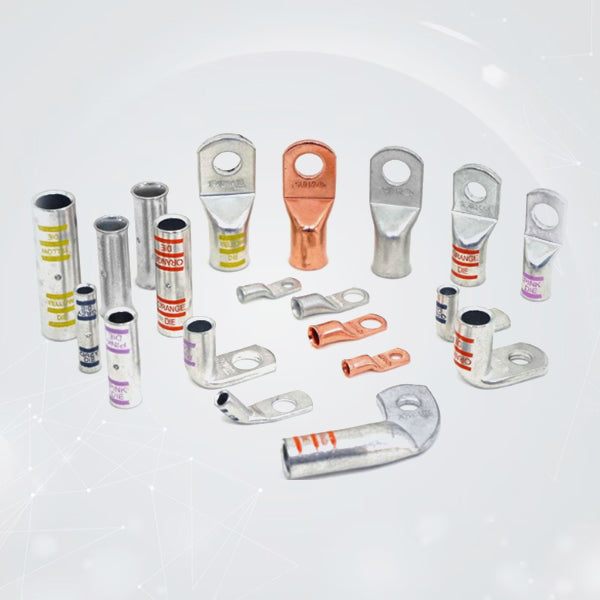
Tinned copper wire lugs are copper connectors that have a layer of tin over them. The tin layer has a significant advantage; it is a barrier to moisture, preventing any corrosion to the copper below, especially in moist or salty environments.
They're perfect for:
- Boats and marine electrical systems
- RVs exposed to road spray and moisture
- Solar setups that live outdoors year-round
- Off-grid cabins and power banks in humid areas
- Anywhere you expect vibration or oxidation
But here’s the thing: tinned copper doesn’t mean “maintenance-free.”
Over time, dirt, grime, and corrosion can still accumulate-especially on exposed surfaces like lug faces or stud contact points. On the lug or stud contact point, this build-up can increase resistance and lower conductivity. In a power system, increased resistance = increased heat = possible failure.
So, if you want your system to run at its best, you’ve got to check in on your lugs once in a while. It’s easy to do, and worth it.
How To Clean Tinned Copper Lugs
Cleaning your tinned copper lugs doesn't have to be a cumbersome task. It's àll quick and easy, and your connections will last longer and be more reliable. Here is how you can do it, step by step:
Step 1: Grab What You Need
We don’t need a lot of fancy tools here, just some basic items:
- A soft-bristle brush (old toothbrushes work great)
- Isopropyl alcohol or an electrical contact cleaner
- A lint-free cloth
- Rubber gloves (if you don’t want to get your hands dirty)
Step 2: Safety First
Before you start cleaning, make sure to always power off your system. I’m talking about safety first, no one wants to deal with a short circuit or an unexpected shock!
Step 3: Damage Review
Now, check the lug. Look for cracks, rust, wear, or damage of any type. For anything serious, it may be a replacement issue; otherwise, if it is just dirt or oxidation, that can be cleaned fairly easily.
Step 4: Use The Cleaner
Get your cloth dampened with your isopropyl alcohol or contact cleaner. Very gently wipe down the lug and concentrate on any areas where the dirt or oxidation is building up. The alcohol is great to break down grime and will not leave any residue behind, unlike some other cleaners.
Step 5: Scrub Lightly
Now that we've cleaned up, if there are still some stuck spots, you may need to scrub them with your brush. Just be careful not to scrub too hard, only enough for the dirt to clean up. Ideally, we want to keep it smooth; you don't want to be scrubbing it like an oven.
Step 6: Dry And Inspect
Now that we've cleaned everything up, grab a dry cloth to wipe off any moisture left over. We don't want any water sitting around to promote rust. Now take a final look at the lug to ensure the tin coating is still in good shape.
When To Replace A Tinned Copper Lug
Cleaning only goes so far. Replace your tinned copper lug if:
- The tin coating is flaking off
- The barrel is deformed or cracked
- You see exposed or frayed copper strands
- The crimp is loose, or the wire pulls out easily
- Corrosion returns soon after cleaning
When in doubt, replace it. The cost of a new lug is tiny compared to the hassle of system failure.
Pro Tips From The Field
- Label your wires — this makes inspection quicker and reduces the chance of miswiring
- Use heat-shrink tubing over lugs in outdoor installs for extra protection
- Bundle and secure your cables to reduce stress at the lug joint
- Check your battery terminals too — the lug isn’t the only point that can corrode
Why Choose Selterm Tinned Copper Lugs?
At Selterm, we’ve been building tinned copper cable lugs for over years. We know these small components are the heartbeat of your electrical system, and we design ours to last, even in the toughest environments.
With Selterm, you get:
- High-purity electrolytic copper cores
- Uniform tin plating for corrosion protection
- UL and CUL listings for safety and performance
- Chamfered entry for smooth wire insertion
- Sizes for every cable and stud configuration
- Compatibility with industry-standard crimping tools
Whether you're maintaining a solar setup, marine rig, or DIY off-grid system, our lugs are built for the job.
Final Thoughts
Tinned copper lugs are made to last, but that doesn’t mean you can set them and forget them. A quick look and a little cleanup every so often can save you from bigger issues like power loss or overheating.
At Selterm, we build our lugs to take on tough environments, but even the best gear runs better with a bit of care. It’s simple stuff that makes a real difference.
Check in on your setup now and then, you’ll thank yourself later. And when it’s time to replace a lug, go with something you know will hold up. Go with Selterm.


